How We Designed a Timeless Wine and Beverage Station With Sub-Zero: 9 Tips to Create Yours
I have been getting several questions about our beverage station since I started sharing the kitchen reveal, so I figured it was time to sit down and give you the full story, and there is a lot to cover! haha! The beverage station was always part of the plan from day one. Way before we started demolition, way before we were even close to picking appliances.
I knew I wanted a dedicated drink station in this kitchen. What I was not sure about was exactly how to execute it! Should we do a wine-and-coffee bar, or separate the coffee system altogether and create a dedicated wine-and-beverage station?
Disclosure: This post is sponsored by Sub-Zero, Wolf & Cove. All opinions are my own.
We ended up going with the separate approach, mostly because of some specific challenges we ran into during the kitchen cabinet design phase. That is a whole story on its own, and I do not want to bore you with it here! In the end, it turned out to be the perfect choice for our space, and I can’t tell you how much we love it and use this space EVERY SINGLE DAY!!!
In this post, I want to share how we got here and how you can create something similar in your own home, whether you are thinking about a new addition to your kitchen, building from scratch, or in the middle of a remodel.
Tip #1: Choose the Right Spot for Your Beverage Station and How We Found Ours
One of the biggest tips I can give you if you are planning a beverage station is to really look around your kitchen (or house) before you decide where it goes. You might be surprised by what you find. For us, it was a wall we had completely overlooked for years.
How We Found Our Spot and Why It Worked So Well For Us
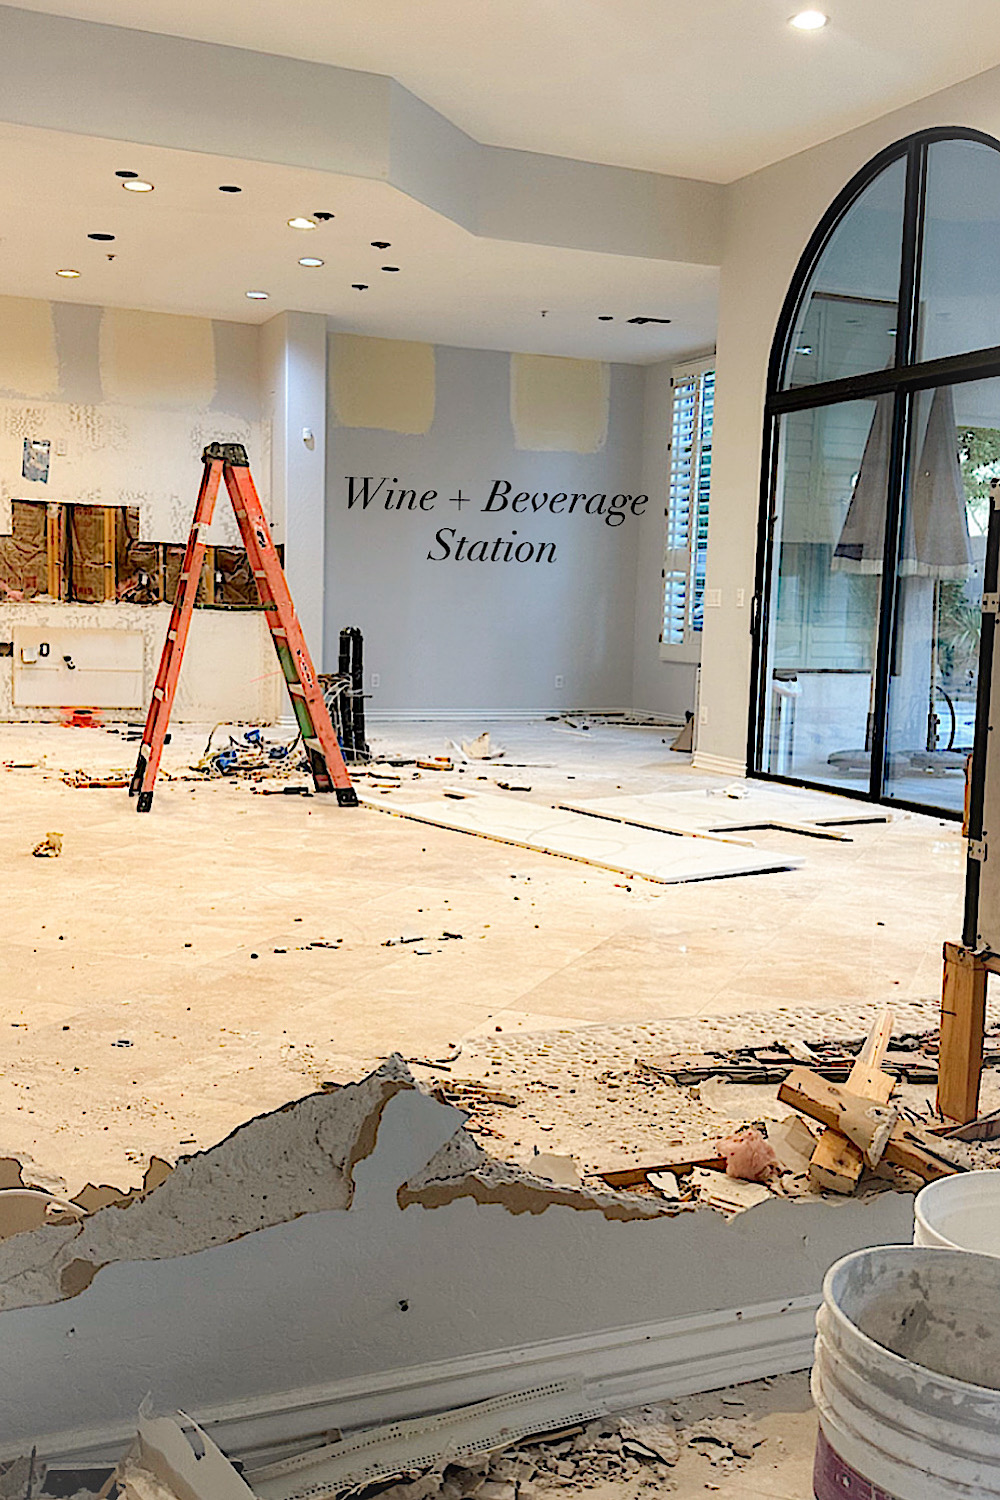
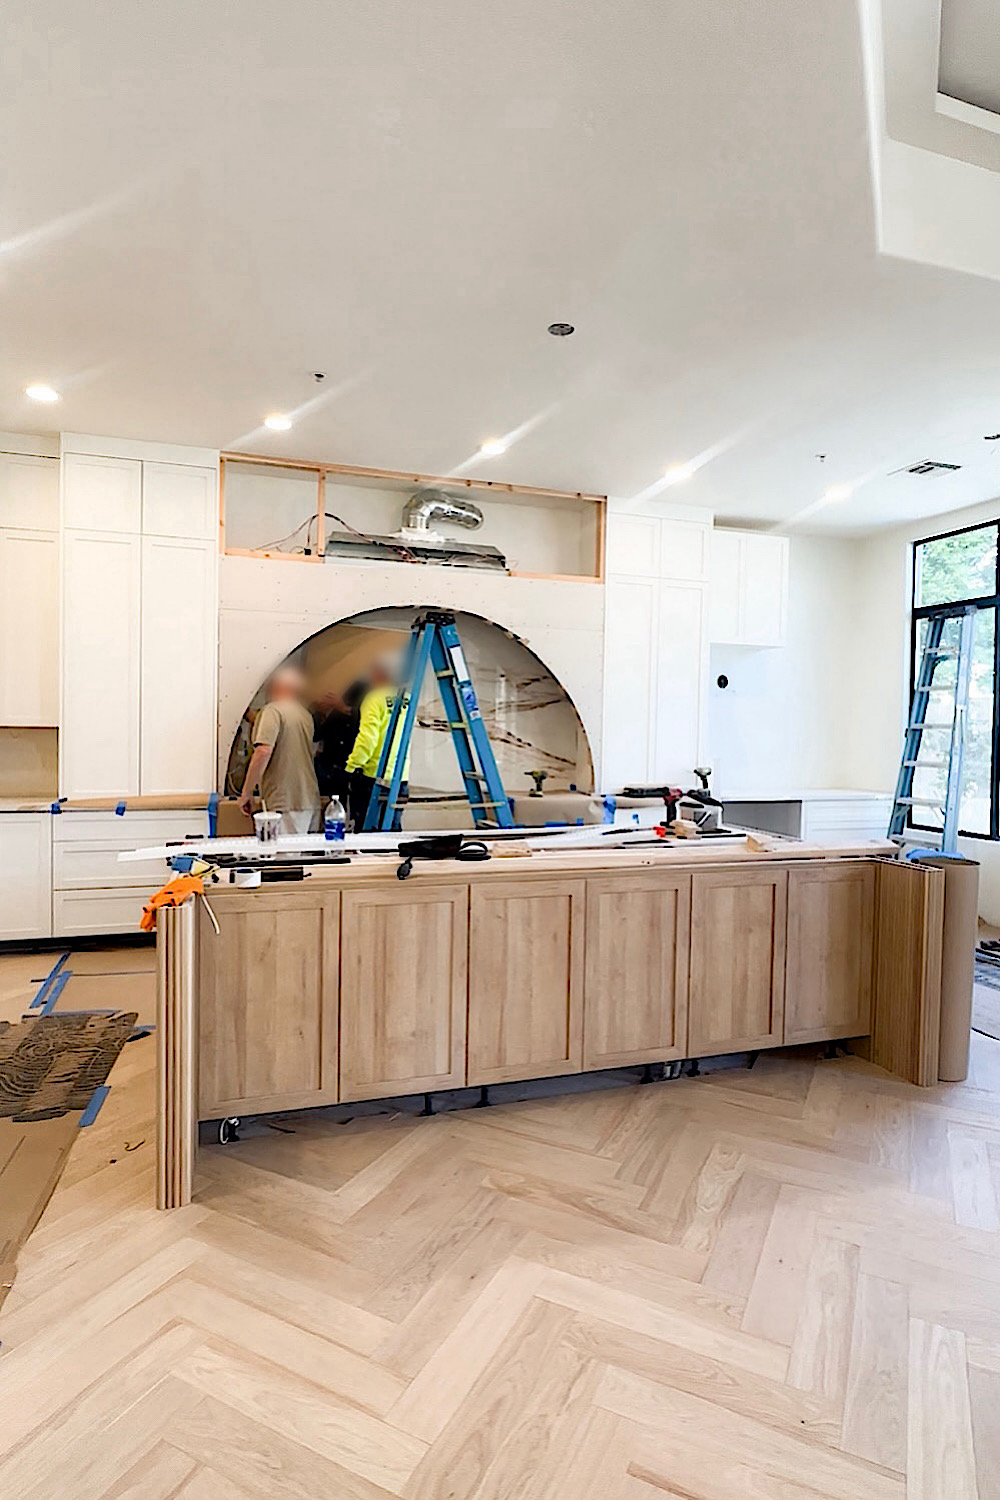
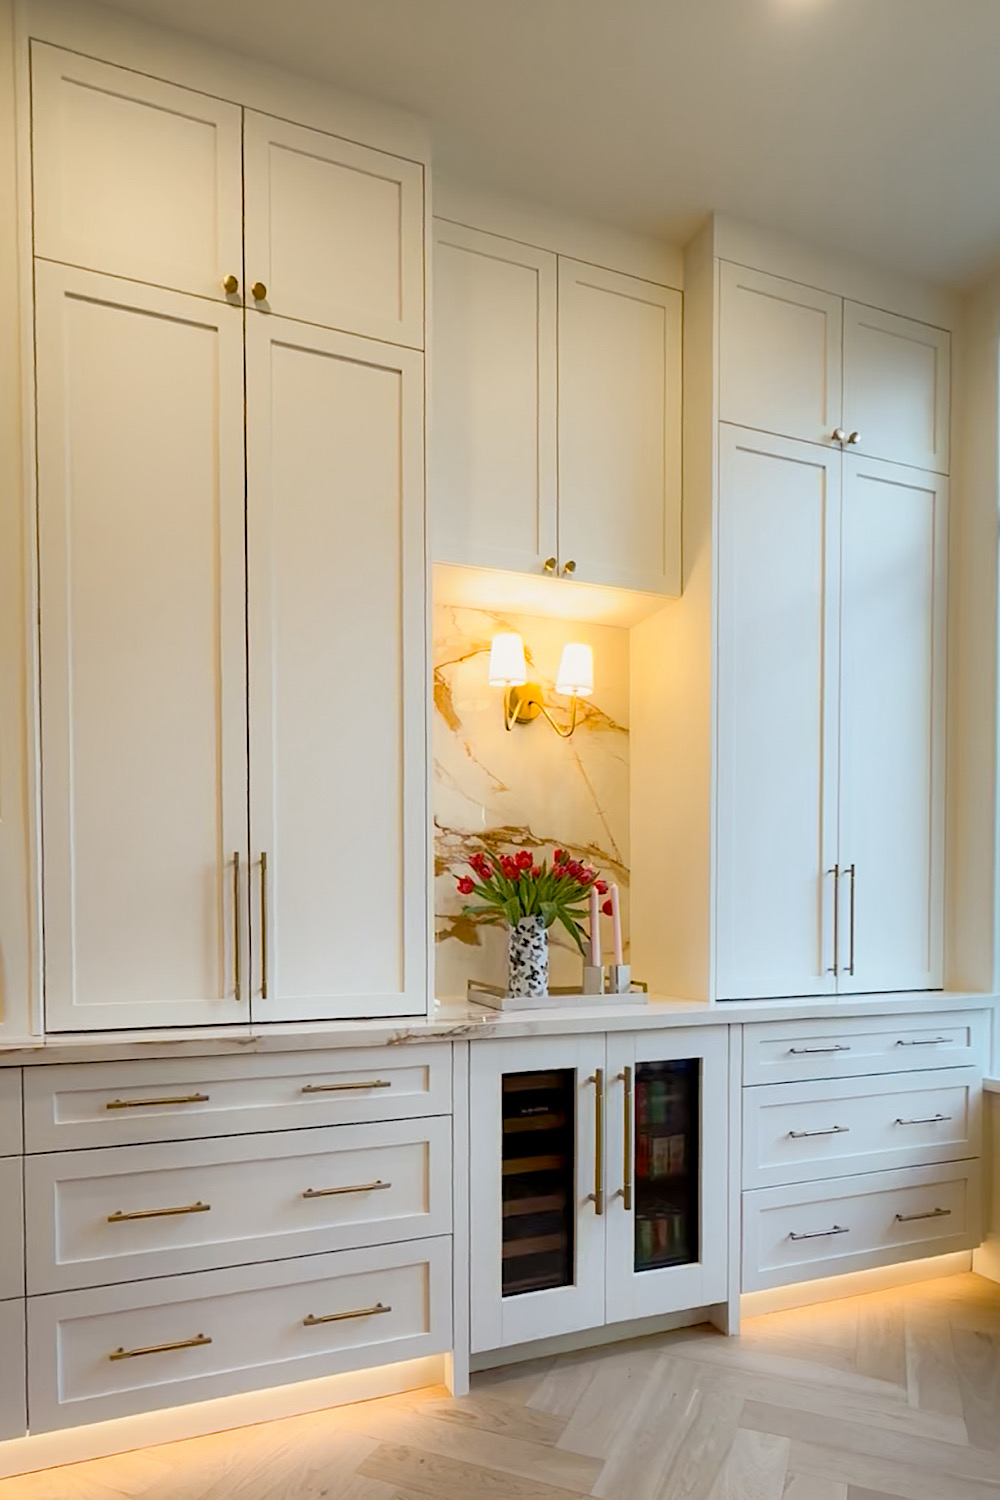
For our kitchen, I wanted the wine and beverage station to feel like a true part of it and not an afterthought. Before the renovation, this particular wall in our kitchen was just sitting there with a few picture frames on it, and honestly, it was so useless.
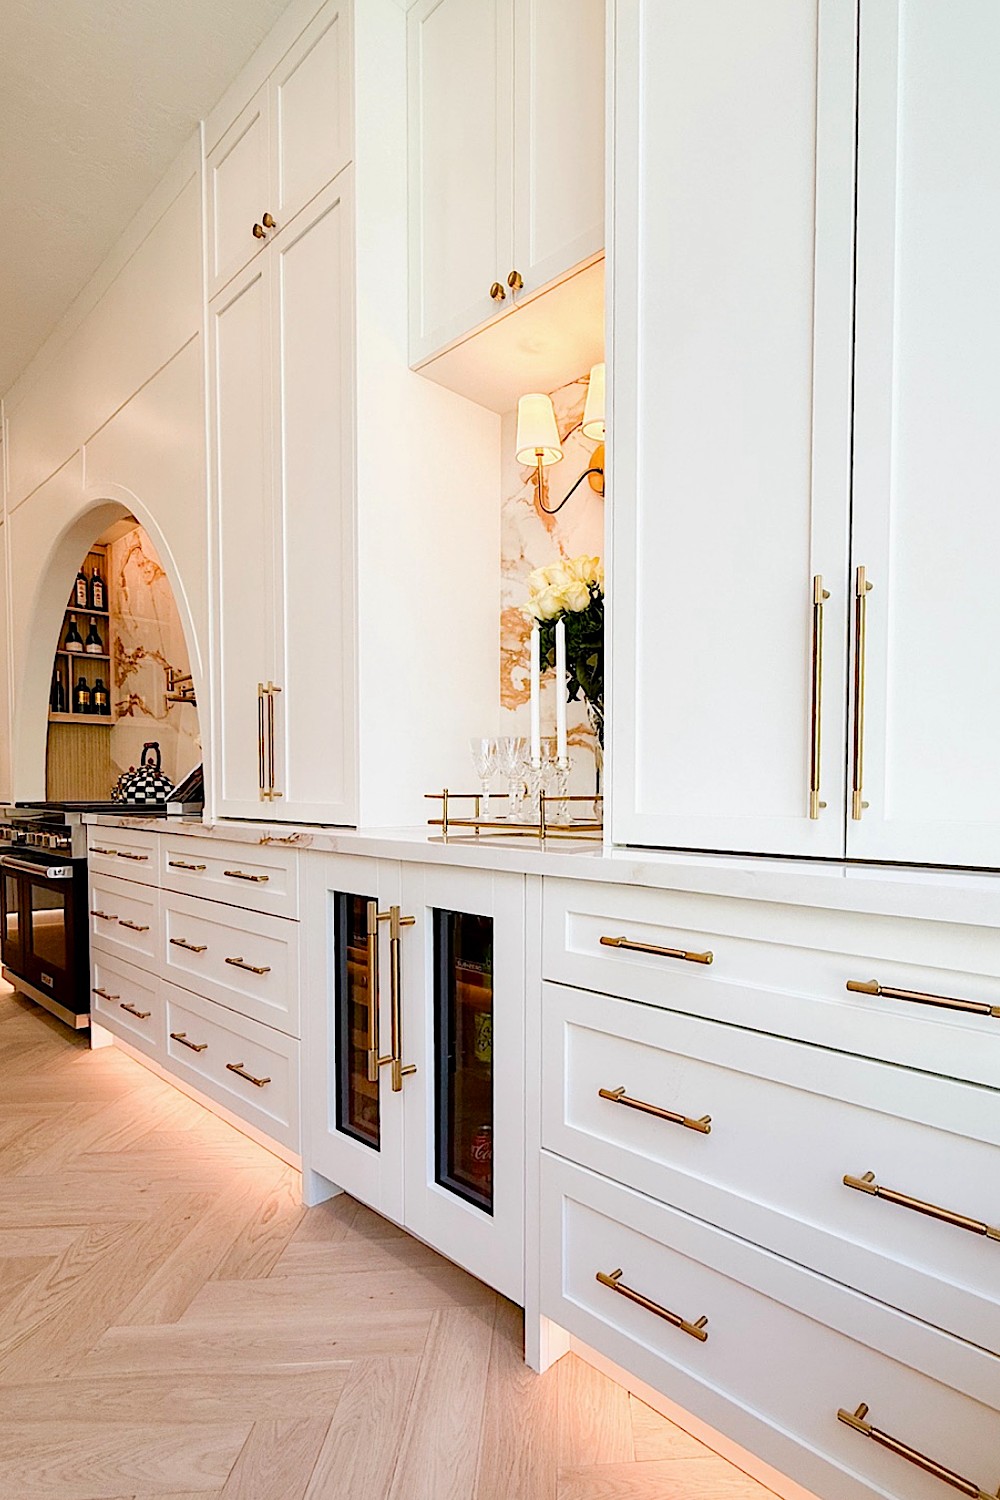
I always knew it could look dramatically different and actually serve a real purpose. I just needed the right vision for it. So when we started planning the kitchen, I knew right away that it was the spot. We built the station right into it, under the counter, flush and level with the rest of the kitchen countertop, so it looks like it was always meant to be there.
And the location ended up being so perfect for how we actually live. When we have family and friends over, everyone naturally gravitates toward our kitchen island anyway. Having the wine and beverage station right there means people can wander over, grab their own bottle of wine or beverage, pour their own drink, and just hang.
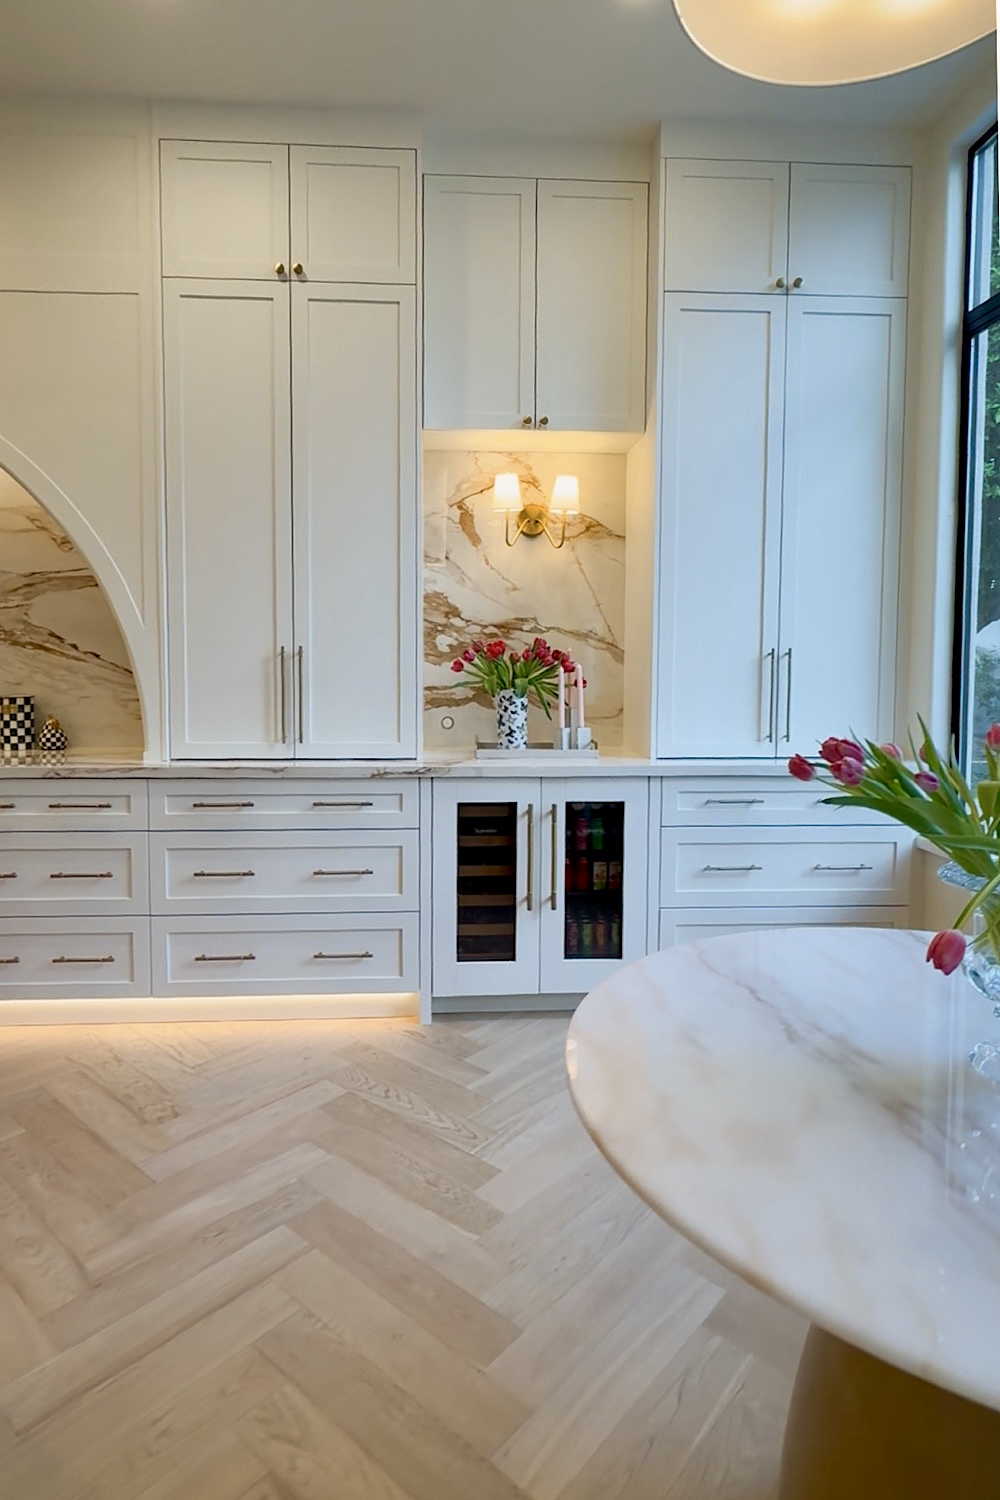
We also turned that corner into a cozy little breakfast nook. It is such a warm and inviting spot, and it made that whole area of the kitchen feel special. What used to be a wall with a few random picture frames on it is now, honestly, one of my favorite spots in the entire house. So before you shop for anything, walk around your kitchen and look for that spot. It might already be right there waiting for you.
Tip #2: Get Clear on Your Vision Before You Buy a Single Thing
This one might sound simple, but it is the tip that will save you the most time, money, and headaches down the road. So before you look at a single product, sit down and ask yourself what you actually want this space to do for you and your family. How do you entertain? What does your daily routine look like? What do you want to feel when you walk into your dream kitchen? Once you know the answers to those questions, everything else, including the appliances, the cabinet design, the storage, all of it just falls into place so much more naturally.
Where to Find Your Inspiration Before You Start Shopping
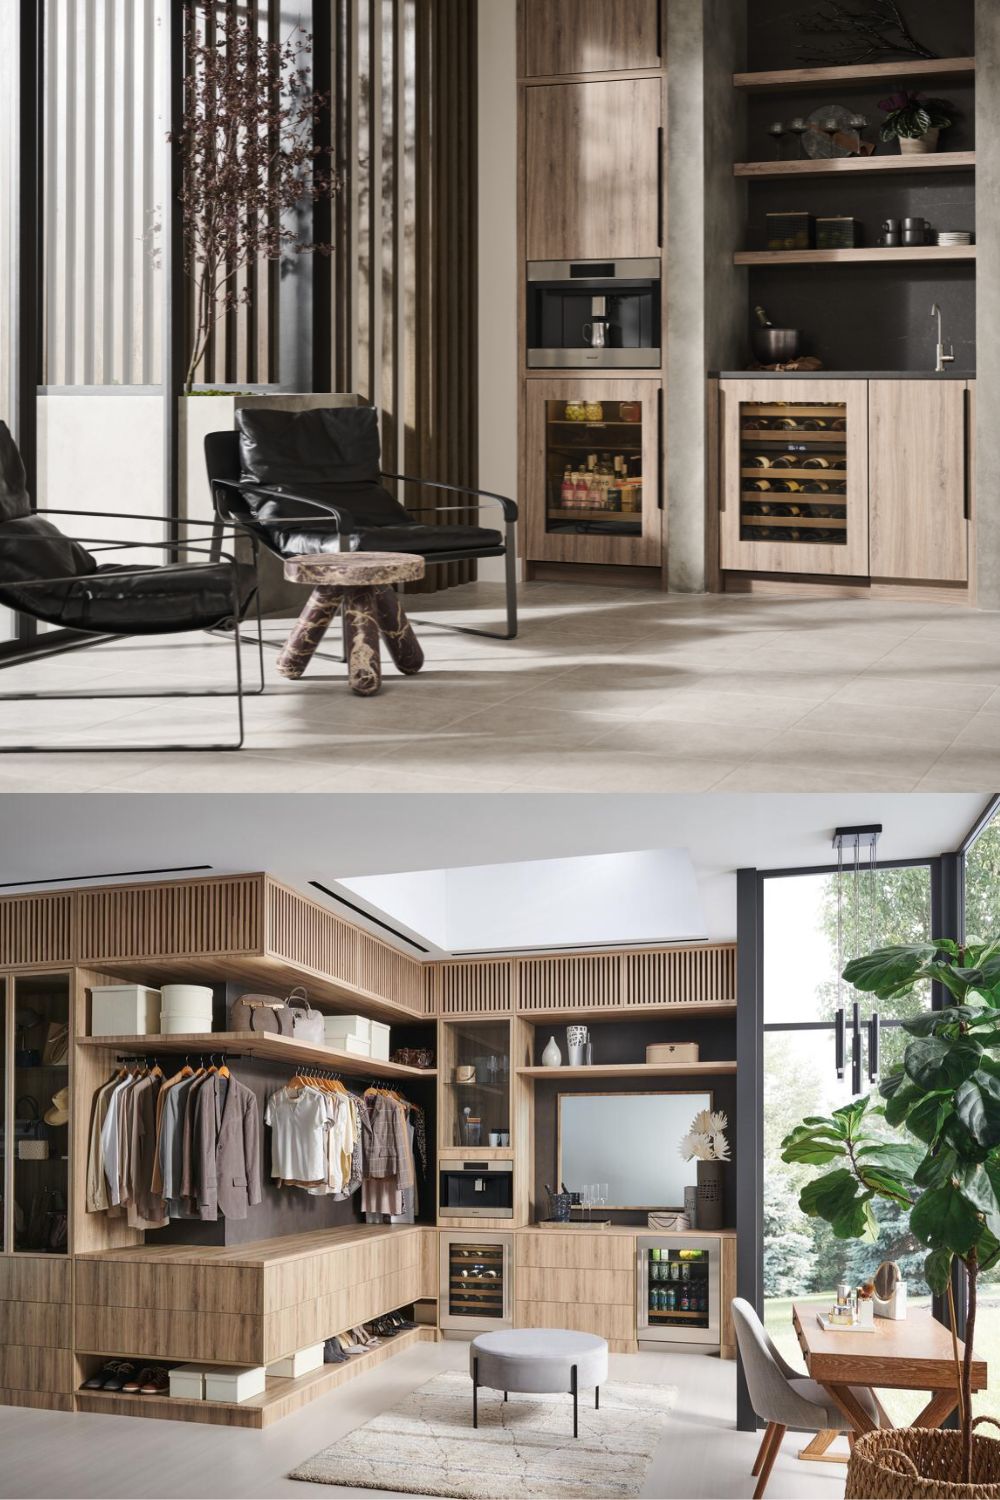
If you are not sure where to start gathering inspiration, here is what worked best for me. Since my heart was already set on Sub-Zero wine and beverage units, I spent a lot of time on their website and Instagram, browsing their design gallery and the beautiful setups they share. Honestly, I got so many great ideas just from browsing their content and seeing how other people had incorporated their wine and beverage units into their kitchen designs. So if you are going the Sub-Zero route, their website and social media are great starting points.
But for overall inspiration, whether it is the beverage station, the kitchen, the bathroom, or any other part of the house, my number one go-to is always Pinterest. Then Instagram, then TikTok, and then Google. Between those four, you will have more ideas than you know what to do with. haha!
And here is my biggest advice when it comes to gathering inspiration. Create a mood board. Seriously, do not skip this step. Start pinning and saving everything you are drawn to, and then pull it all together in one place. When you look at everything together, you will start to see patterns in what you love, giving you a clearer picture of your overall design direction. It is one of those steps that sound simple but make the whole planning process so much easier and more fun.
Tip #3: The Design Phase: What You Need to Think About First
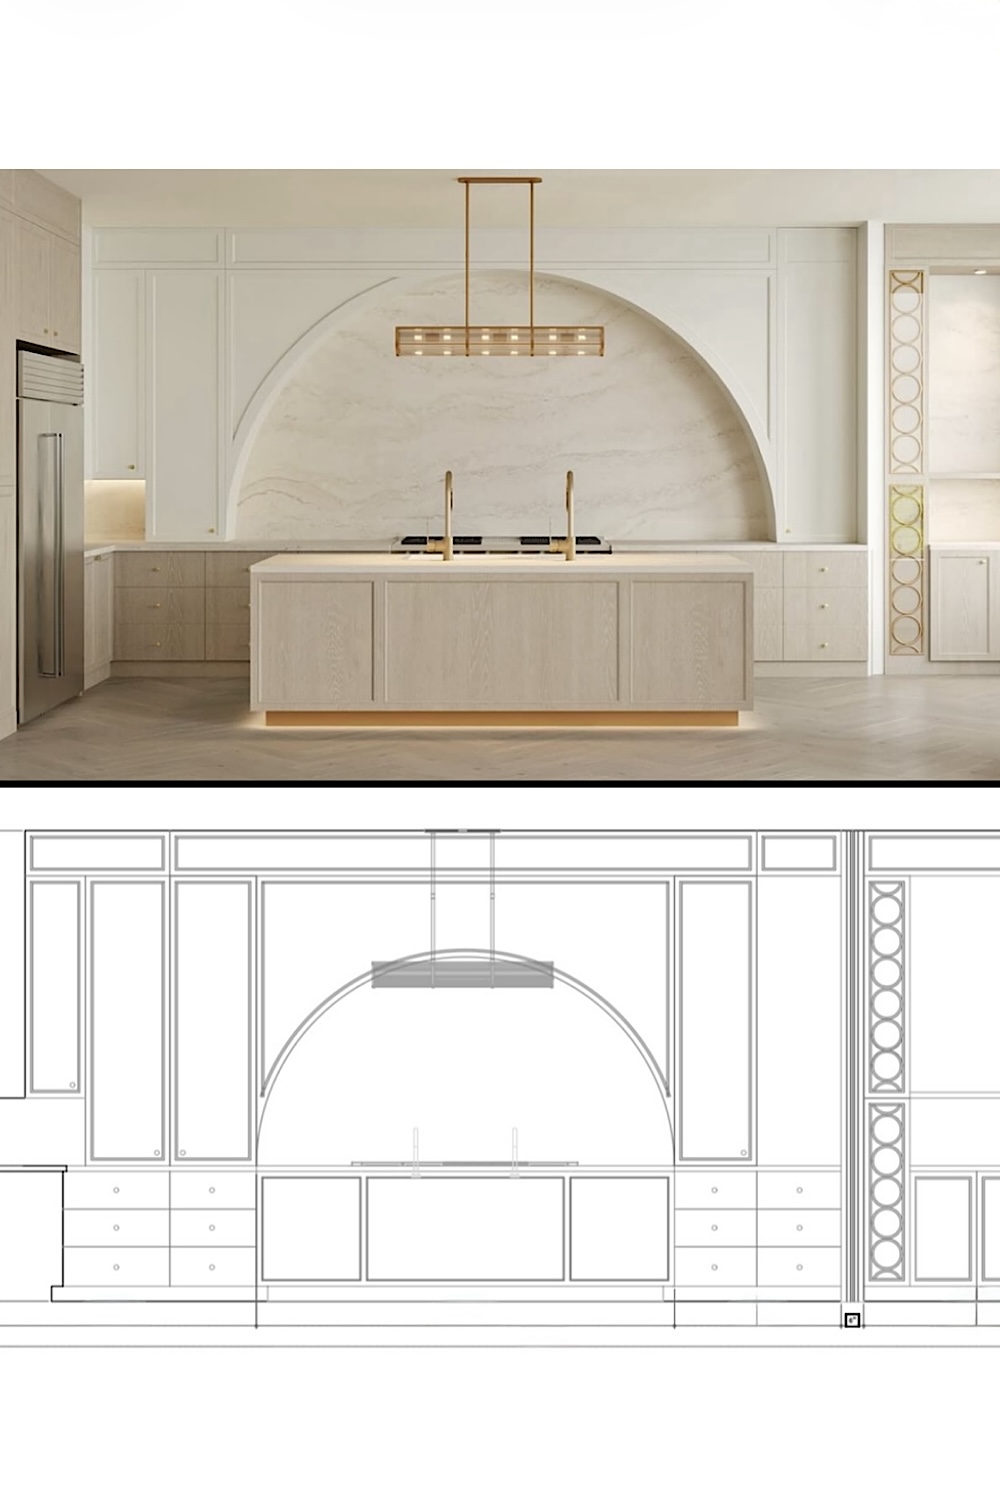
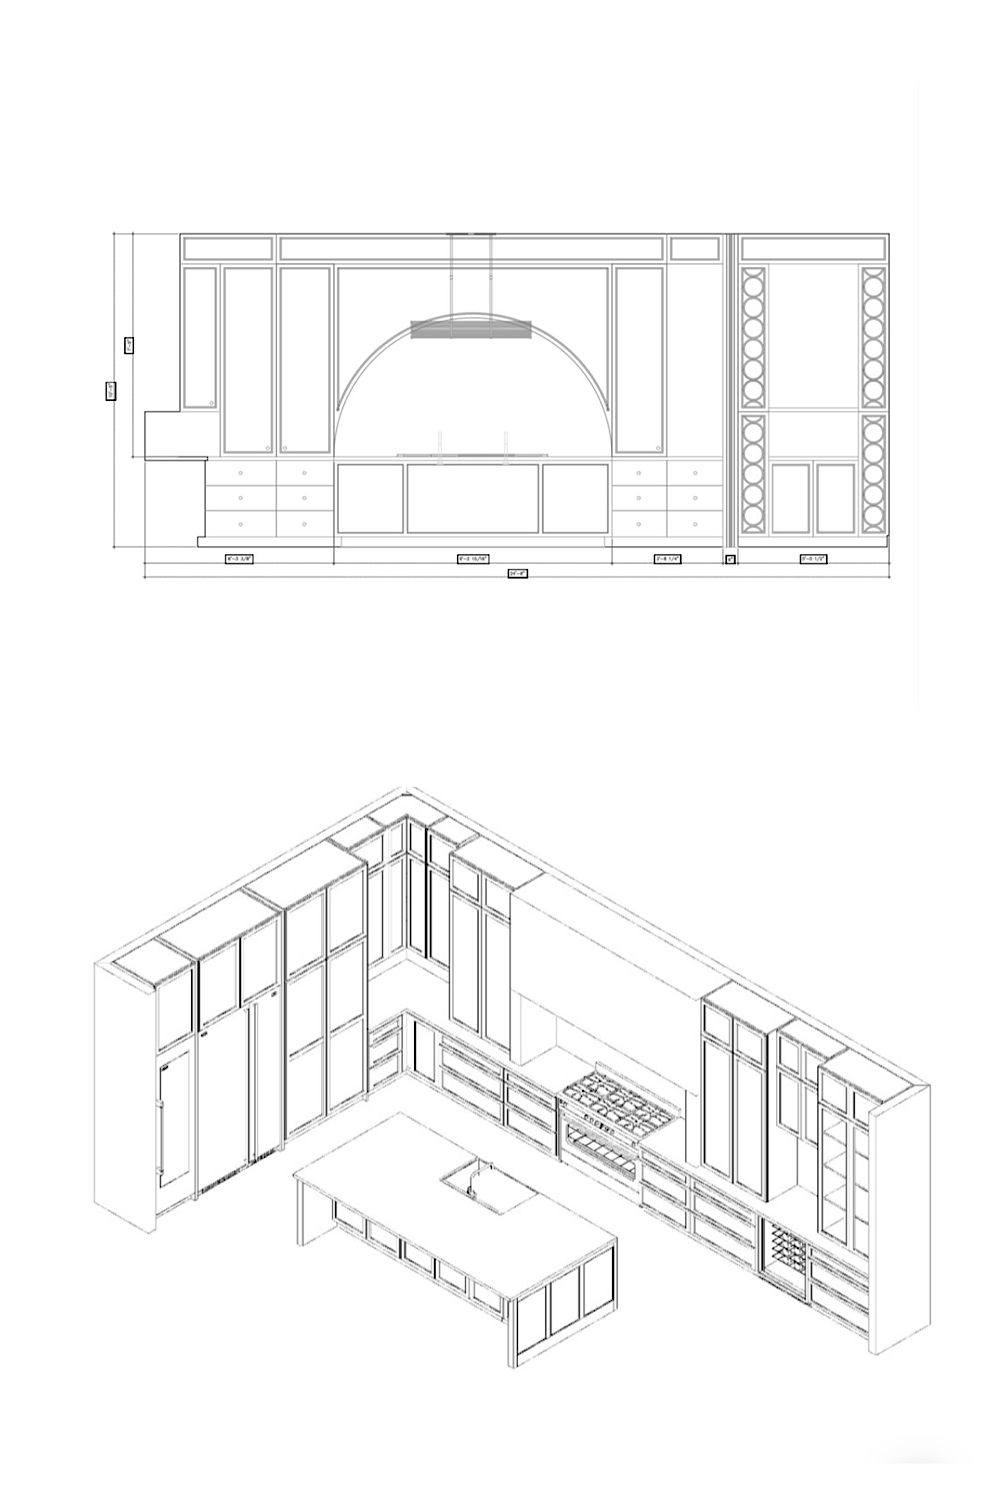
Once you have your vision and found your spot, the real work begins. The design phase is one of the most important parts of this process, and there is so much more to consider than most people realize going in.
If you are going undercounter as we did, you need to know exactly how deep your cabinets are and whether your appliance of choice will actually fit flush with everything else. If you have a specific wine storage or beverage center in mind, make sure to pull the exact dimensions and confirm they work with your cabinet sizes, drawer configuration, and countertop height. It sounds like a lot because it is. haha!
Why This Phase Is Harder Than It Looks and What We Learned
Matt and I sat through so many design sessions with the designers, our kitchen cabinet company, and several contractors, going back and forth on this. We reviewed the plans over and over, redesigned things, reconfigured the layout, and went through several rounds of changes before we finally landed on something that worked.
Not because we did not know what we wanted, but because fitting a built-in wine and beverage station into a kitchen design while keeping everything functional and beautiful is just not as straightforward as it looks on Pinterest. haha!
For example, our kitchen cabinet company made several measurement mistakes, sometimes as small as half an inch or one inch, and those tiny mistakes caused significant delays because the appliances simply would not fit as intended.
It was frustrating and stressful, and there were moments when we wanted to just give up. I actually know several people who did give up on their dream kitchen at exactly this stage, and that breaks my heart because the end result is so worth it.
So my biggest advice for this phase is to be patient and be flexible. Work closely with your designer, your kitchen company, your electrician, your plumber, and anyone else involved in the project. Measure everything multiple times. Know your exact appliance dimensions before you finalize anything. And just mentally prepare yourself for this phase to be a little stressful. It is completely normal, and it does not mean anything is going wrong. It is just part of the process. Push through it. I promise you will be so glad you did.
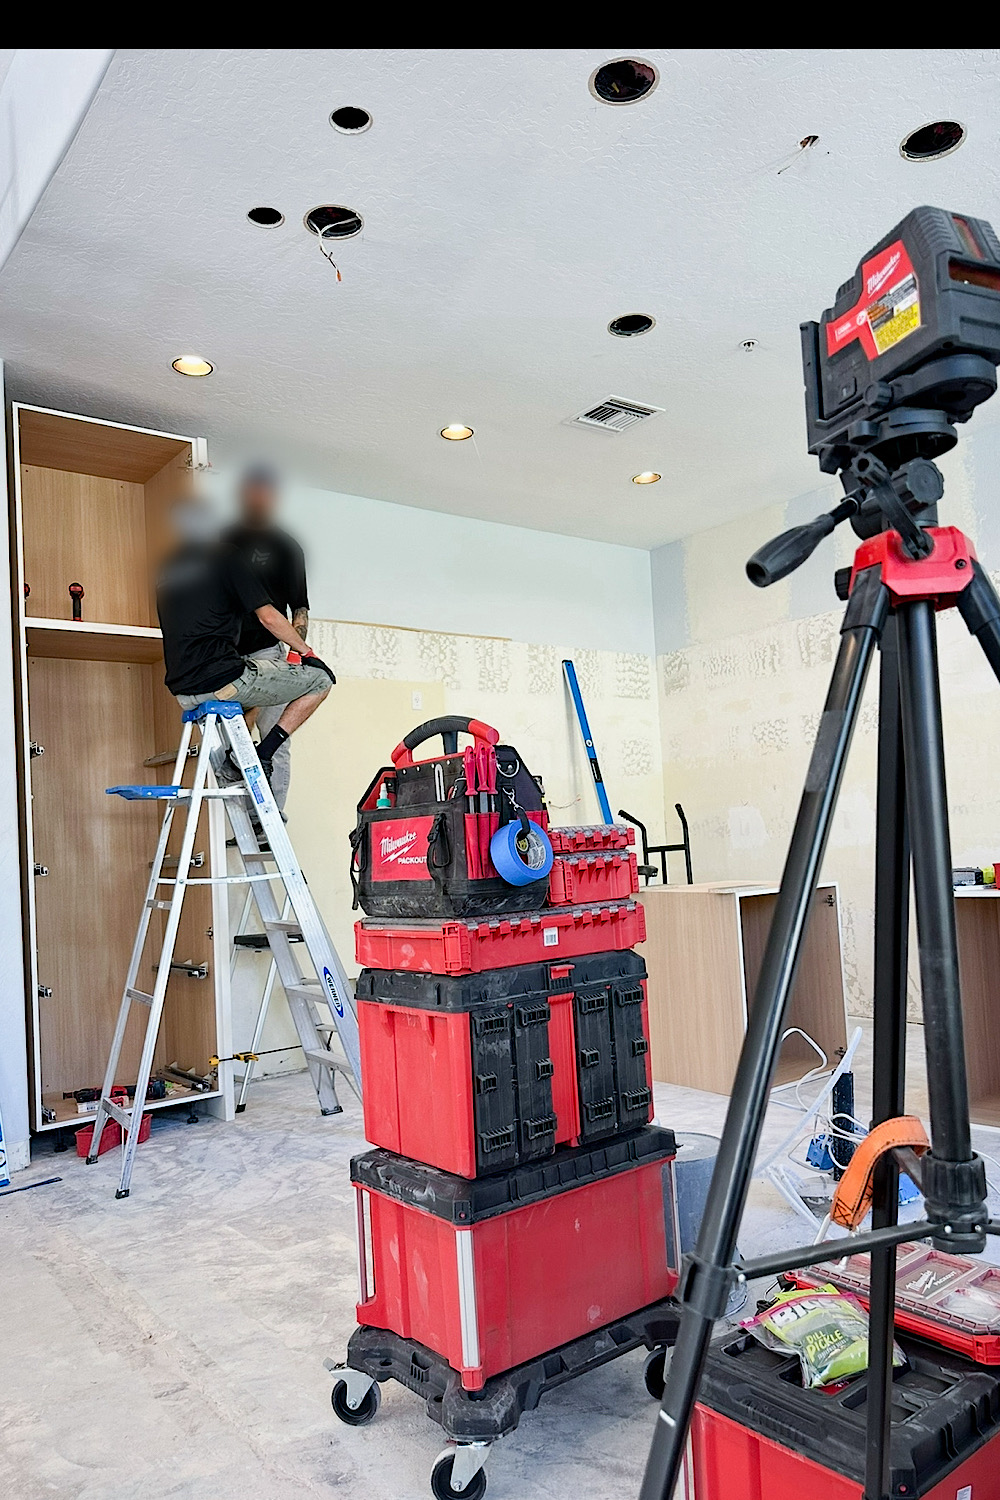
Tip #4: Think About the Plumbing and Electrical Early, Way Earlier Than You Think
This is one of those tips that sounds boring, but it is so important. haha! Plumbing and electrical work are the two things that can completely derail your timeline and budget if you do not plan for them early enough in the process. And when it comes to a beverage station in the kitchen, there is more to think about than most people realize.
Here is something a lot of people do not know going into a renovation. Every single appliance comes with a spec sheet, and that spec sheet is everything. It dictates exactly where your plumbing, electrical circuits, and gas lines must be located for that appliance to work properly in your space. Your kitchen cabinet company and your contractors need to work directly from those spec sheets before anything gets built.
If you are planning to add a sink to your beverage station (we did not, but if you do), make sure to involve your plumber well before construction starts. Where are the water lines going to run? Where is the drain going? Is there already plumbing in that wall, or does it need to be roughed in from scratch? These questions can completely change your layout and budget if you find out about them too late in the process.
The electrical side is just as important. A beverage station cabinet with a refrigerator, a wine storage unit, and under-cabinet lighting all need dedicated electrical circuits. You do not want to be plugging multiple appliances into the same circuit and tripping breakers every time you have people over. haha! Talk to your electrician early, tell them exactly which appliances you plan to install, and make sure everything is properly planned before your walls are closed up.
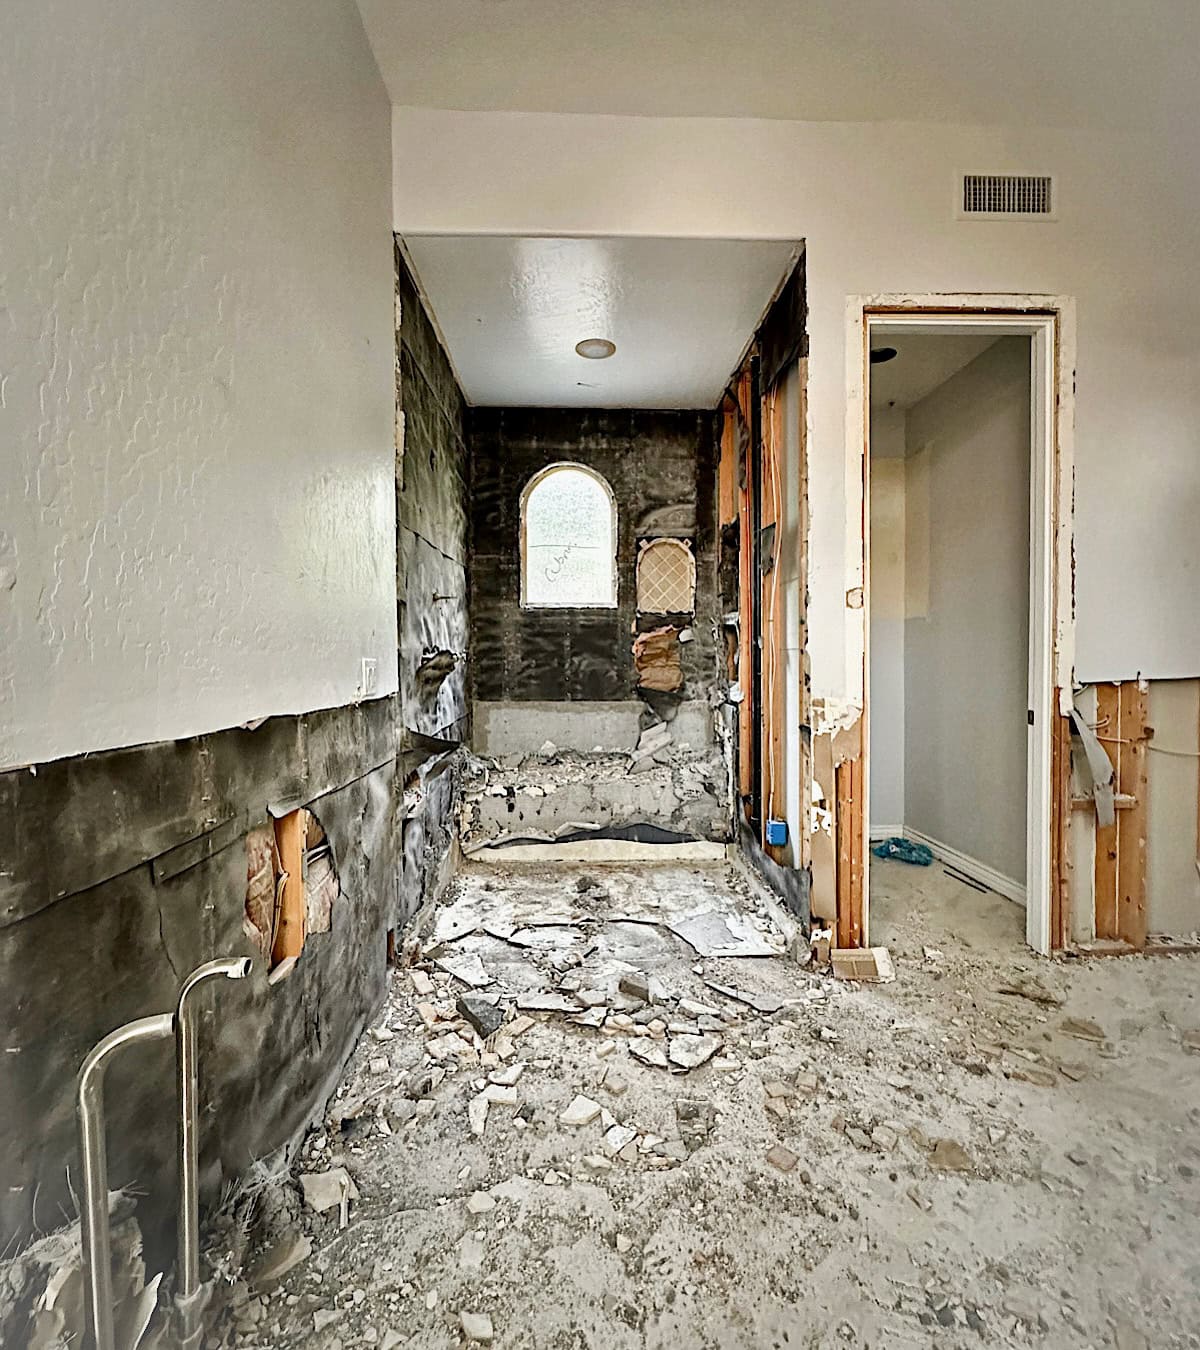
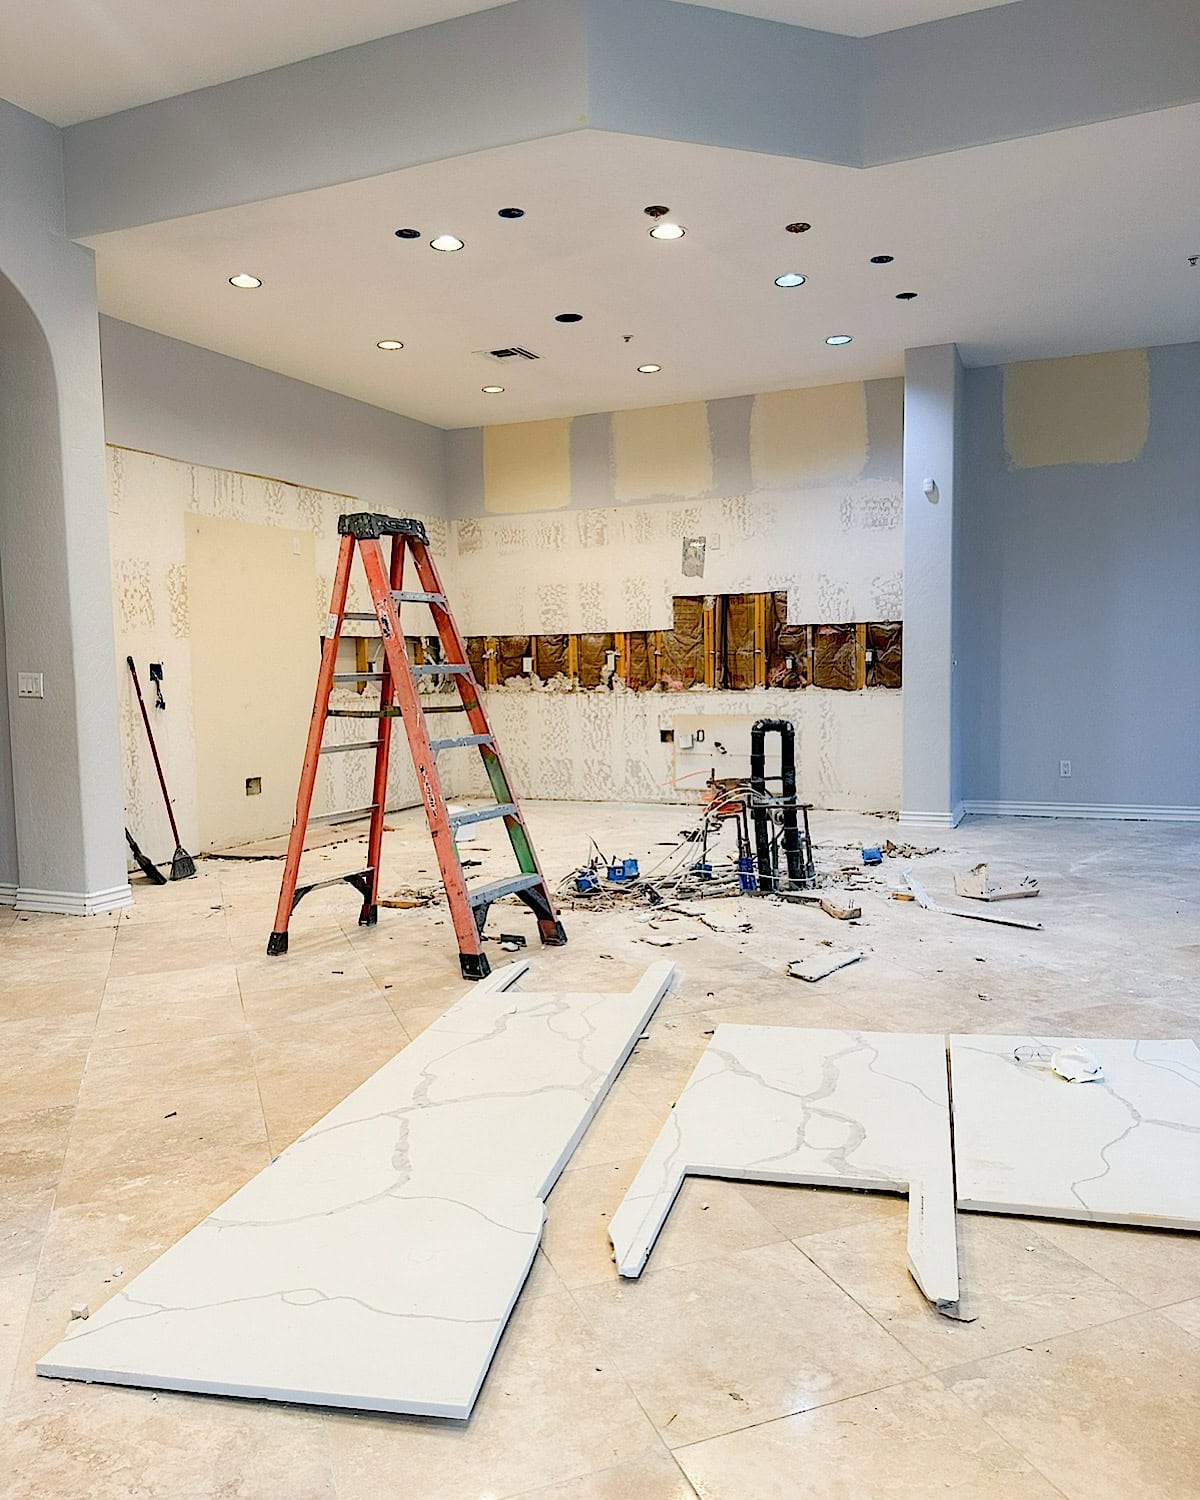
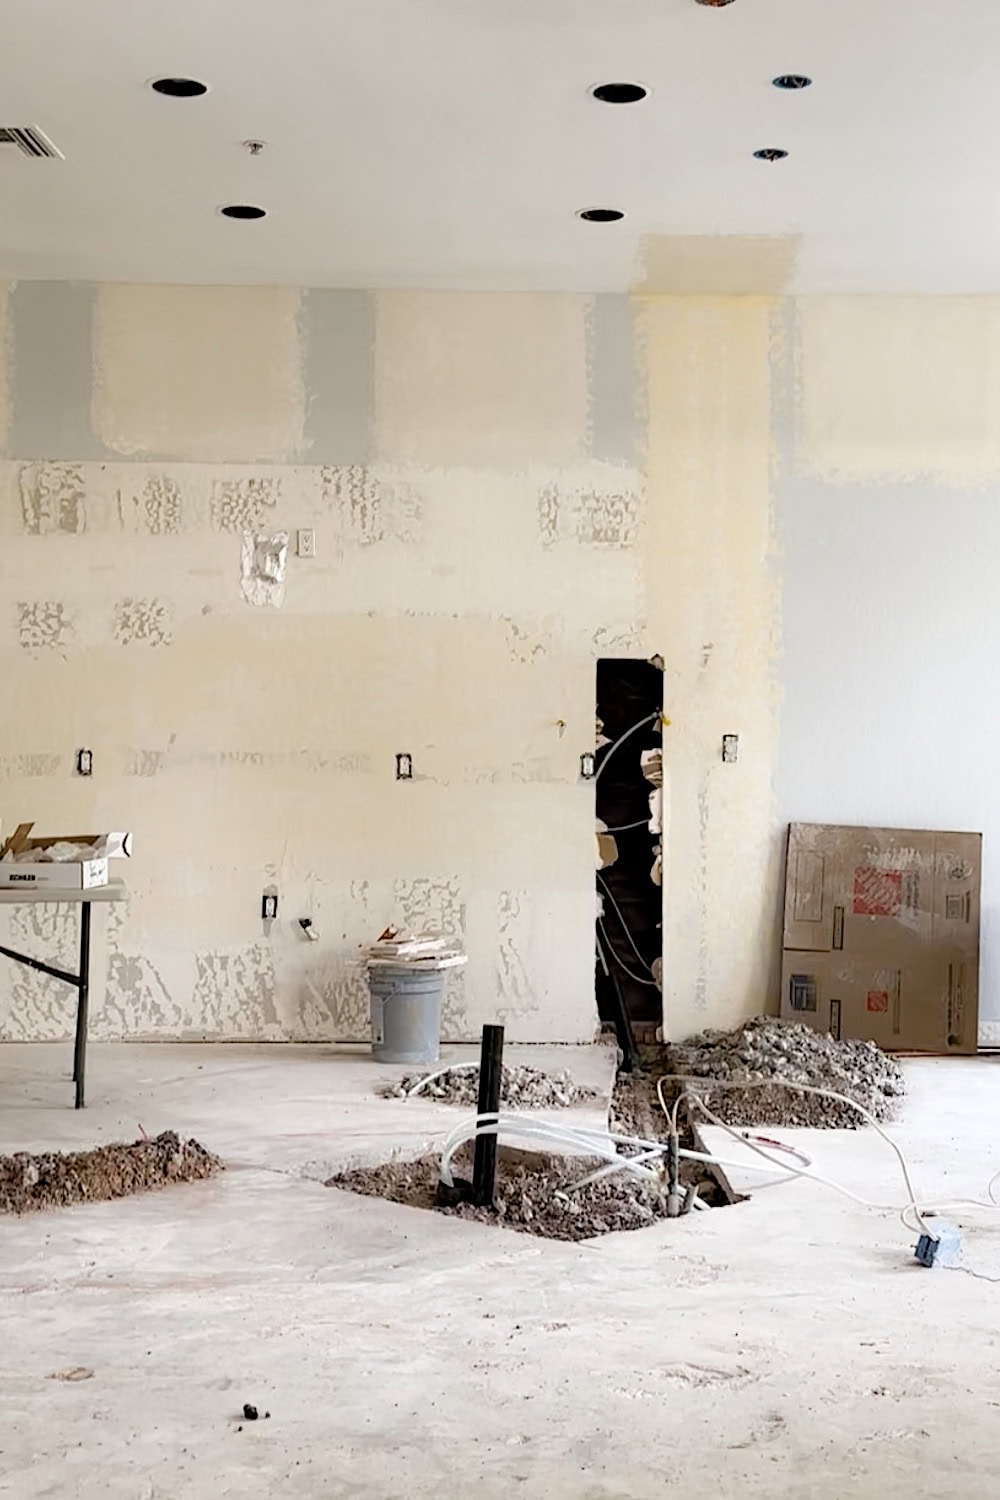
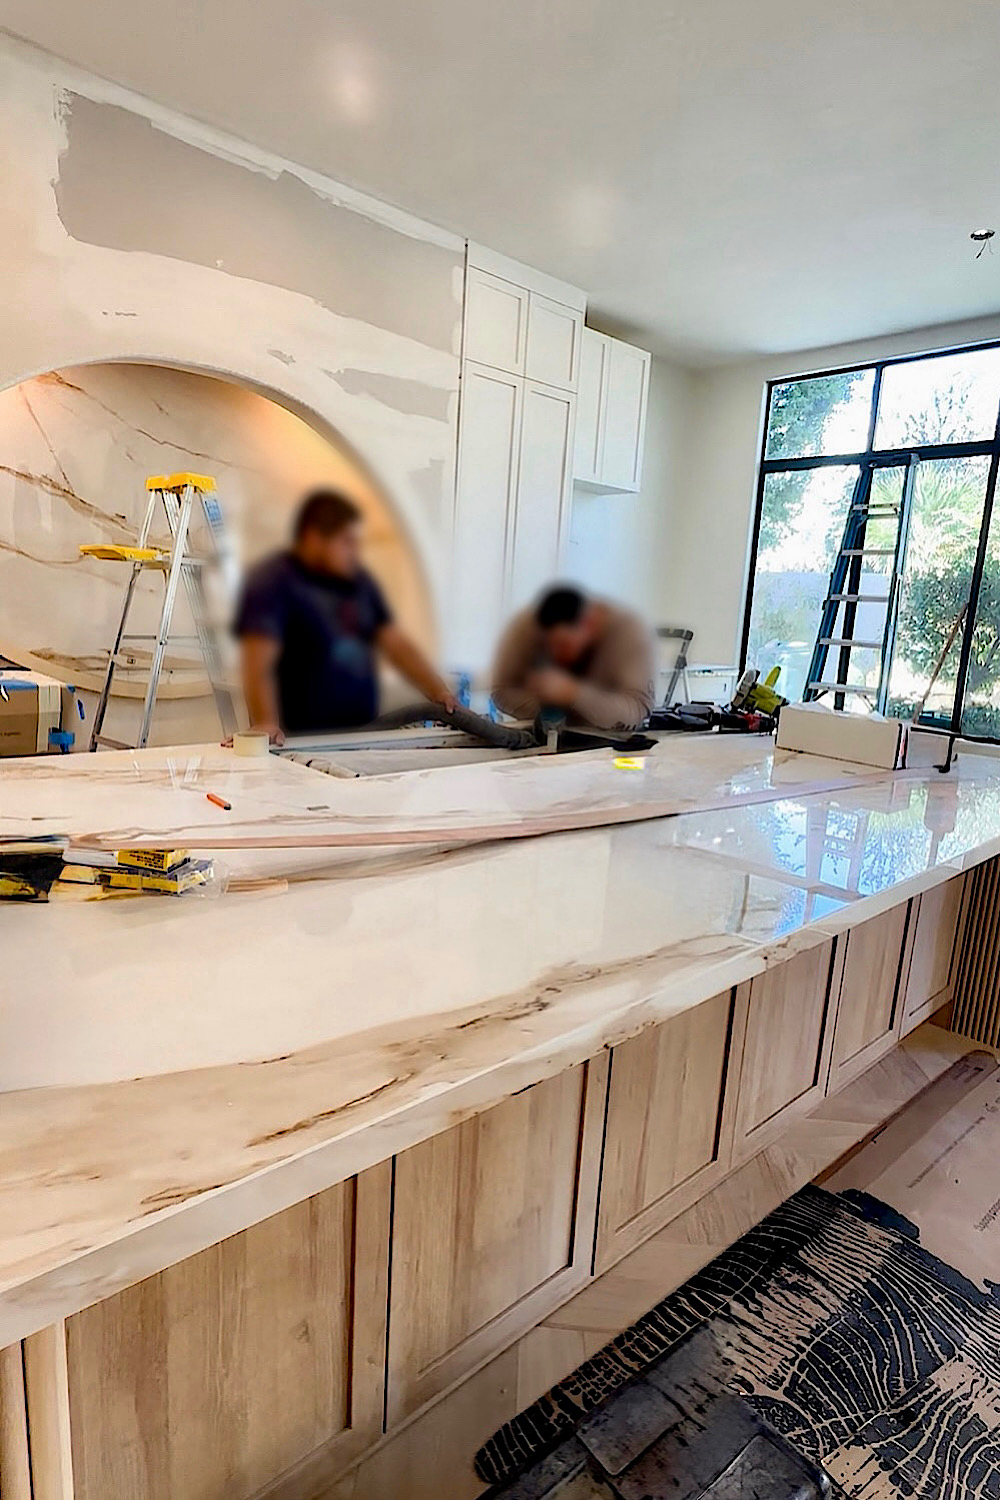
Everything Needs to Be in Place Before Demo Day and Here Is Why

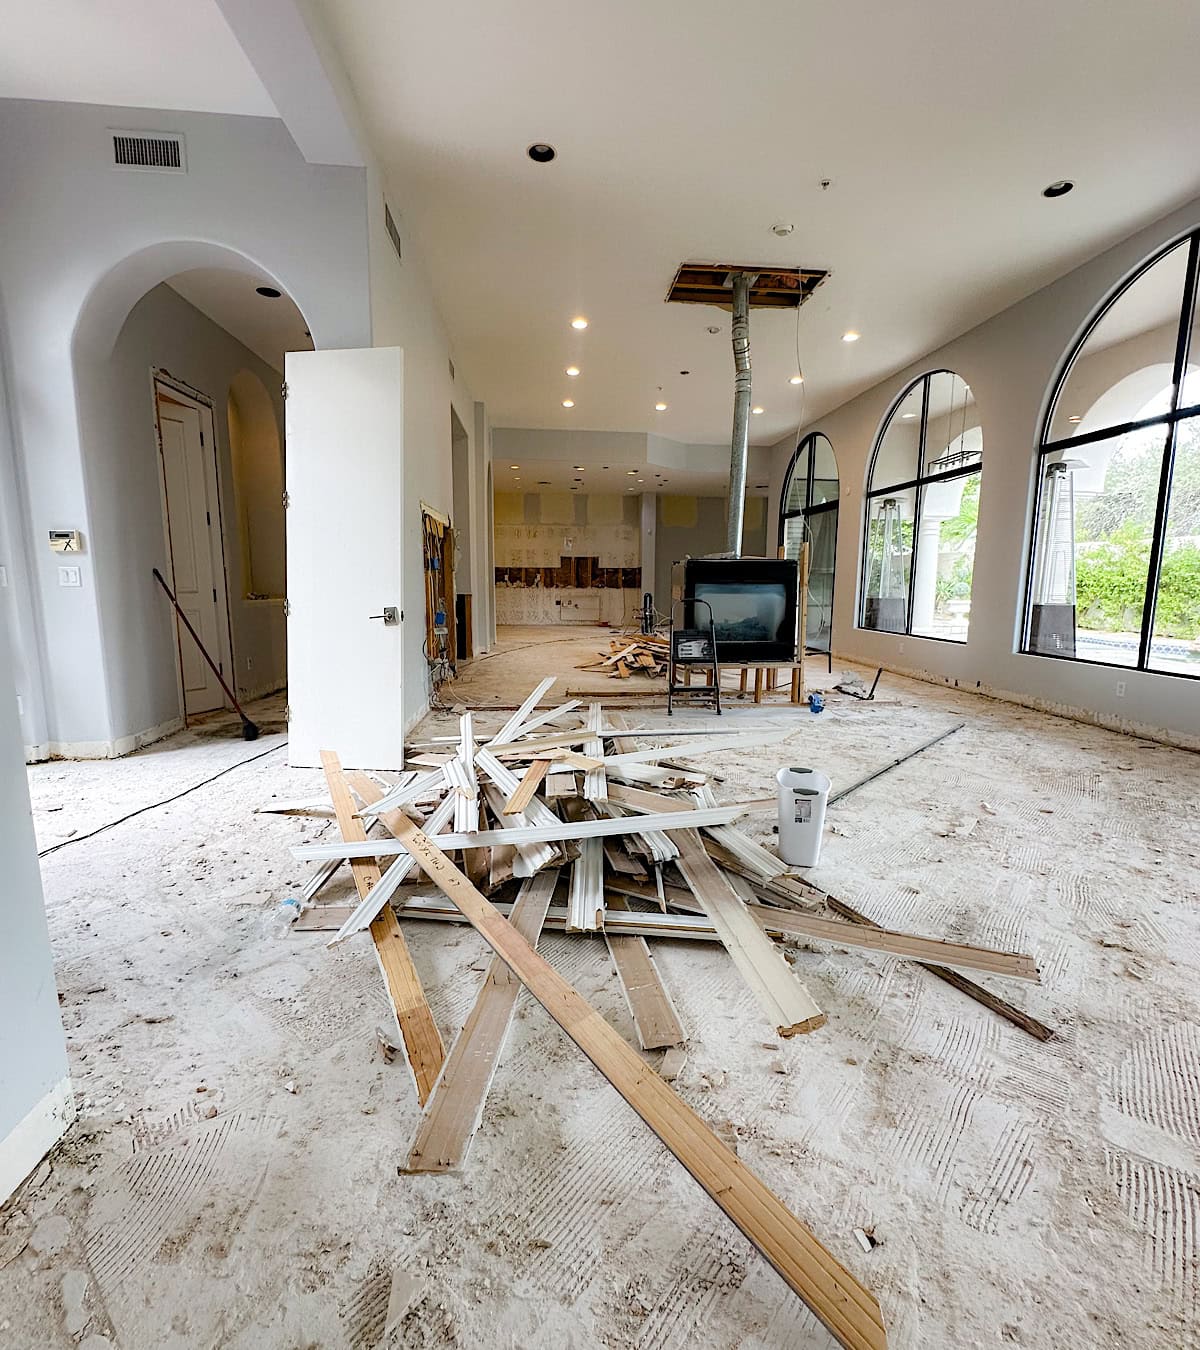
Demo day is not just the exciting part where the walls come down and the renovation finally feels real. It is actually your most important window in the entire project, and you need to be fully prepared for it before it arrives. Ideally, you want your plumber and electrician fully involved and briefed well before that date, not scrambling to figure things out after the walls are already open.
Because here is what happens when those walls come down. Everything is exposed. All the bones of your home are right there in front of you, and that is your one and only chance to run all the wiring, complete all the plumbing connections, and take care of everything that will eventually be hidden behind walls and under floors.
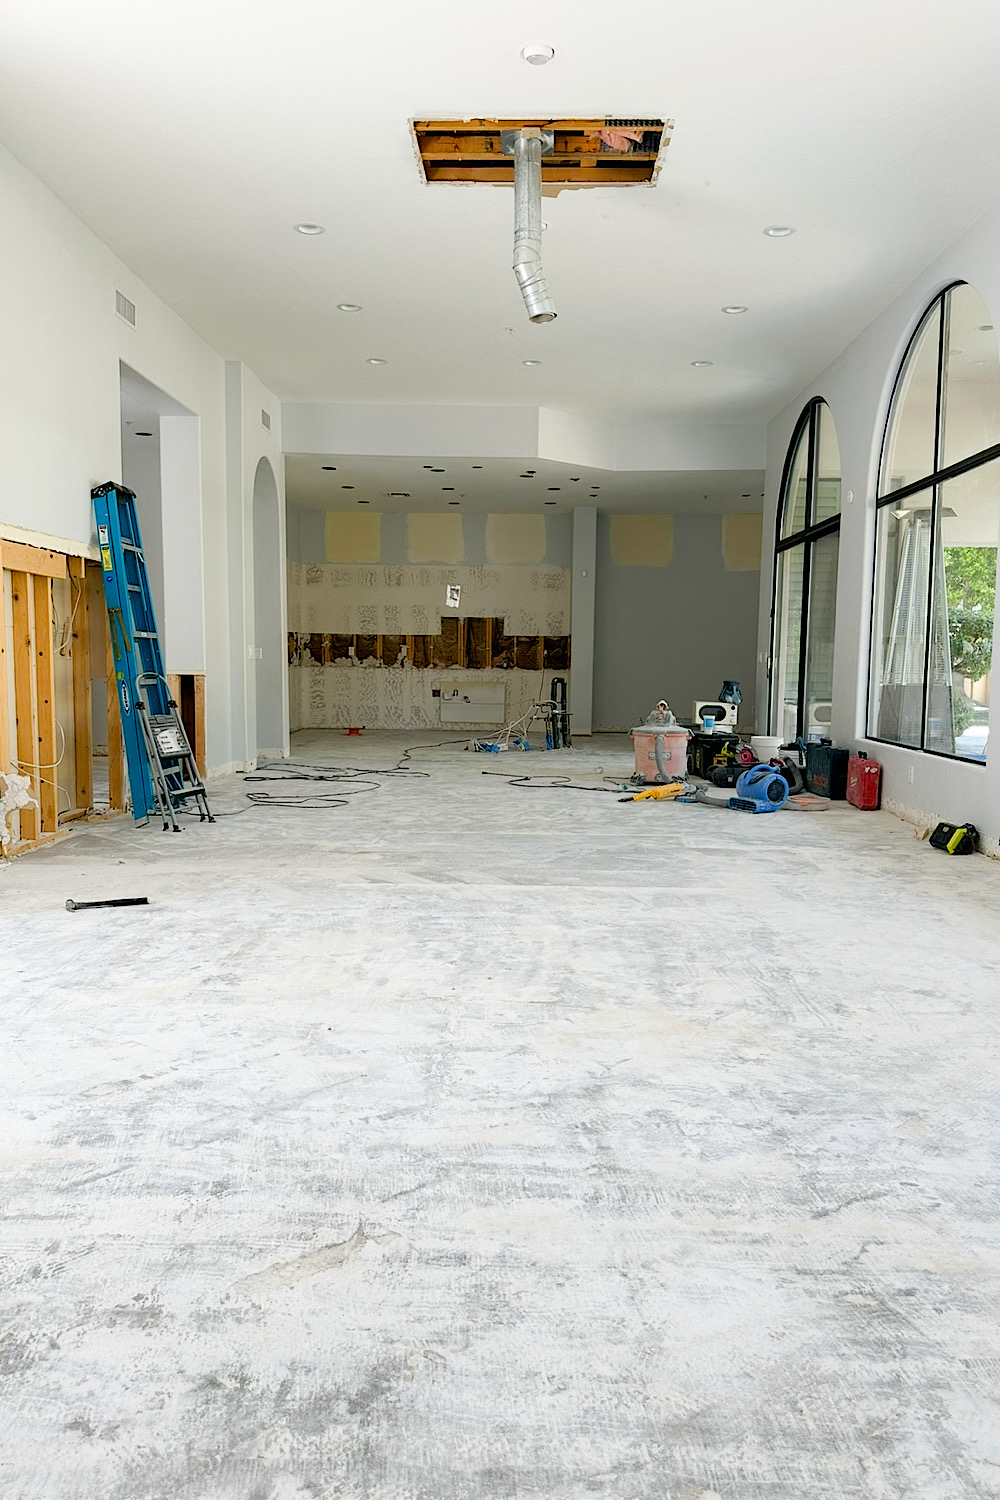
That window does not stay open long. Once those walls are closed back up, going back in to fix or add anything becomes a very expensive and very disruptive project that nobody wants to deal with. So use that open wall time wisely, have everything planned and scheduled in advance, and make sure every contractor knows exactly what they need to do before demo day arrives.
Tip #5: Do Not Start Building Your Beverage Station Until Every Cabinet Layout Detail Is Figured Out
This step is so much more important than most people give it credit for, and it is one of the things we spent the most time on before construction even started. Once construction begins, making changes becomes very expensive and very stressful. So before your contractor picks up a single tool, you want to know exactly how every single cabinet around your beverage station is going to function in your day-to-day life. Ask yourself the real questions before you finalize anything.
What are you going to store in each cabinet? Do you want drawer cabinets or door cabinets? Where are your wine glasses going to live? What about your bar tools, your coffee products, your everyday beverage products? If you are adding a beverage station cabinet with a fridge, how much cabinet space are you giving up, and is what you are gaining worth it for your family?
The Questions You Need to Ask Yourself Before Construction Starts
For us, it took a lot of time to think through exactly how each cabinet around our built-in beverage station would function. We knew we wanted some drawer cabinets for smaller items and accessories, and a deeper drawer cabinet for larger items like wine tools and extra beverage products.
We also had to make sure we were not compromising any of our existing kitchen storage in the process. That balance is really important, and it is easy to overlook when you are focused on how beautiful the station will look.
And here is the thing nobody really talks about when it comes to beverage station ideas. The cabinet layout is what determines whether your station actually works for your real life or just looks good in photos.
A beautiful beverage station cabinet setup with no functional storage around it will be frustrating within the first week. Think through every single detail, every cabinet, every drawer, every shelf, before anything gets built. You will thank yourself later.
Tip#6: Pick Your Appliances Wisely: Our Final Choice and Why
This is the part of the process that I really think deserves the most attention and research. Your appliances are a long-term investment in your home, and you want to choose something that will last, perform beautifully, and still look great years from now. Whatever your budget is, take your time with this decision, compare your options carefully, and do not let a pretty picture on Instagram or Pinterest make the decision for you.
I researched every single Sub-Zero undercounter option they offer and made multiple trips to the Sub-Zero, Wolf, and Cove showroom in Scottsdale because seeing them in person is just a completely different experience from looking at photos online.
If you have a showroom near you, please go and see their products in person. Once you see each product up close, you will have a much better idea of what will and what will not work for your space. I also wrote a whole separate post breaking down every Sub-Zero wine storage model, if you want all the details before making a decision.
And honestly, you do not need to be a wine person at all to want a setup like this. Even if you only drink wine occasionally, this station becomes a beautiful functional space when you love having people over and entertaining guests. It just makes everything feel more intentional and put together. The point is having a dedicated, organized, and beautiful drink station that works for your real life and your home.
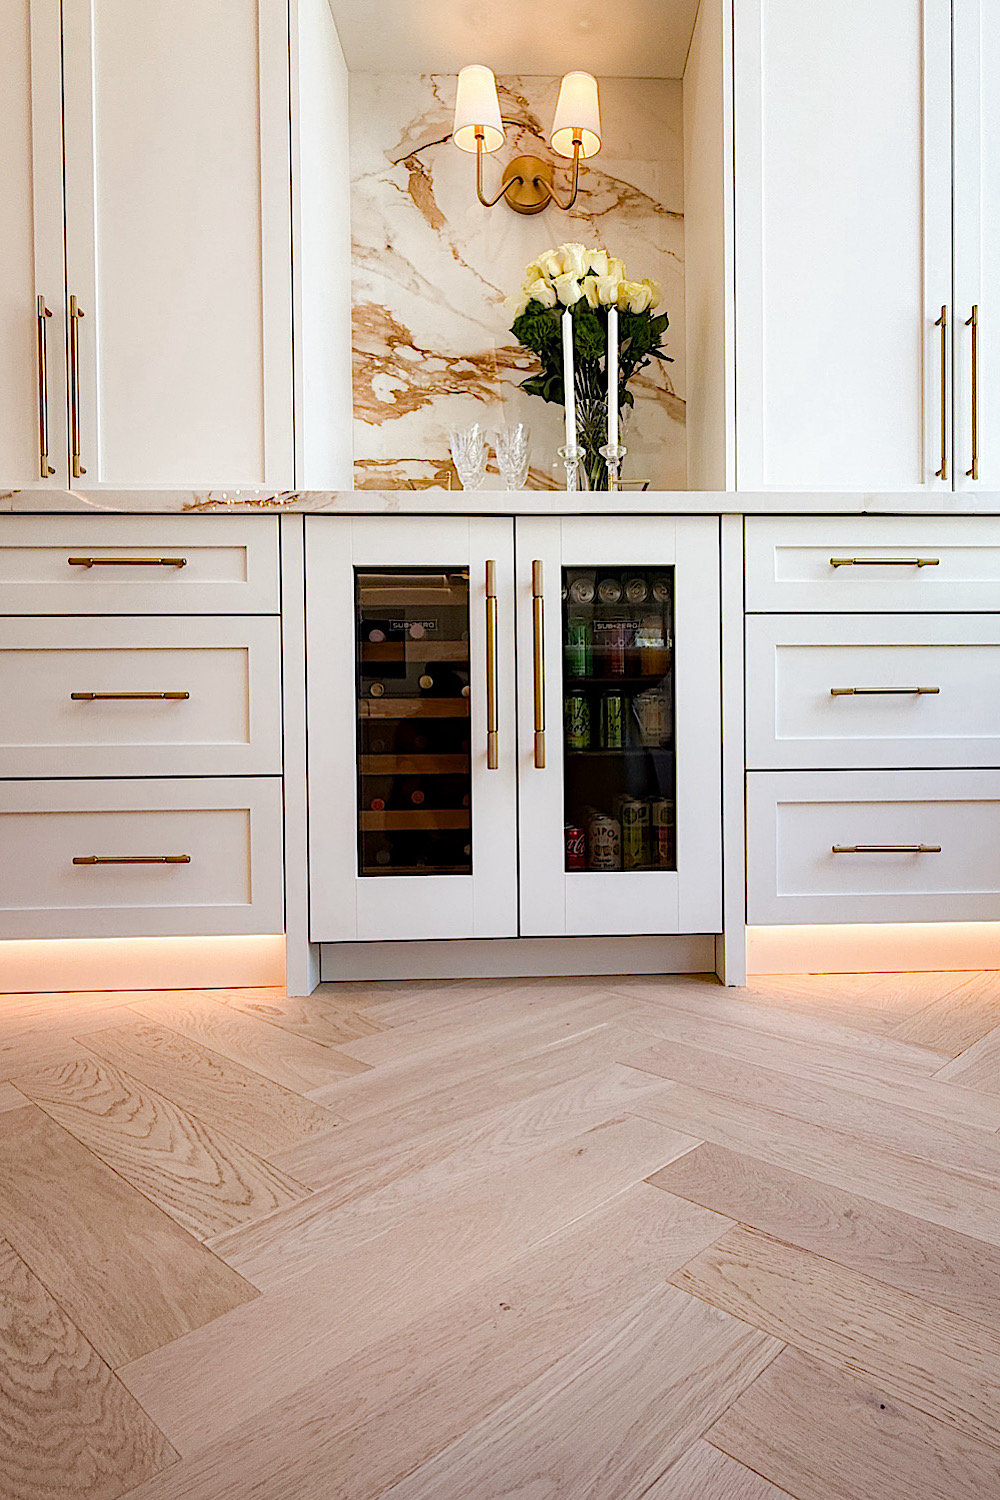
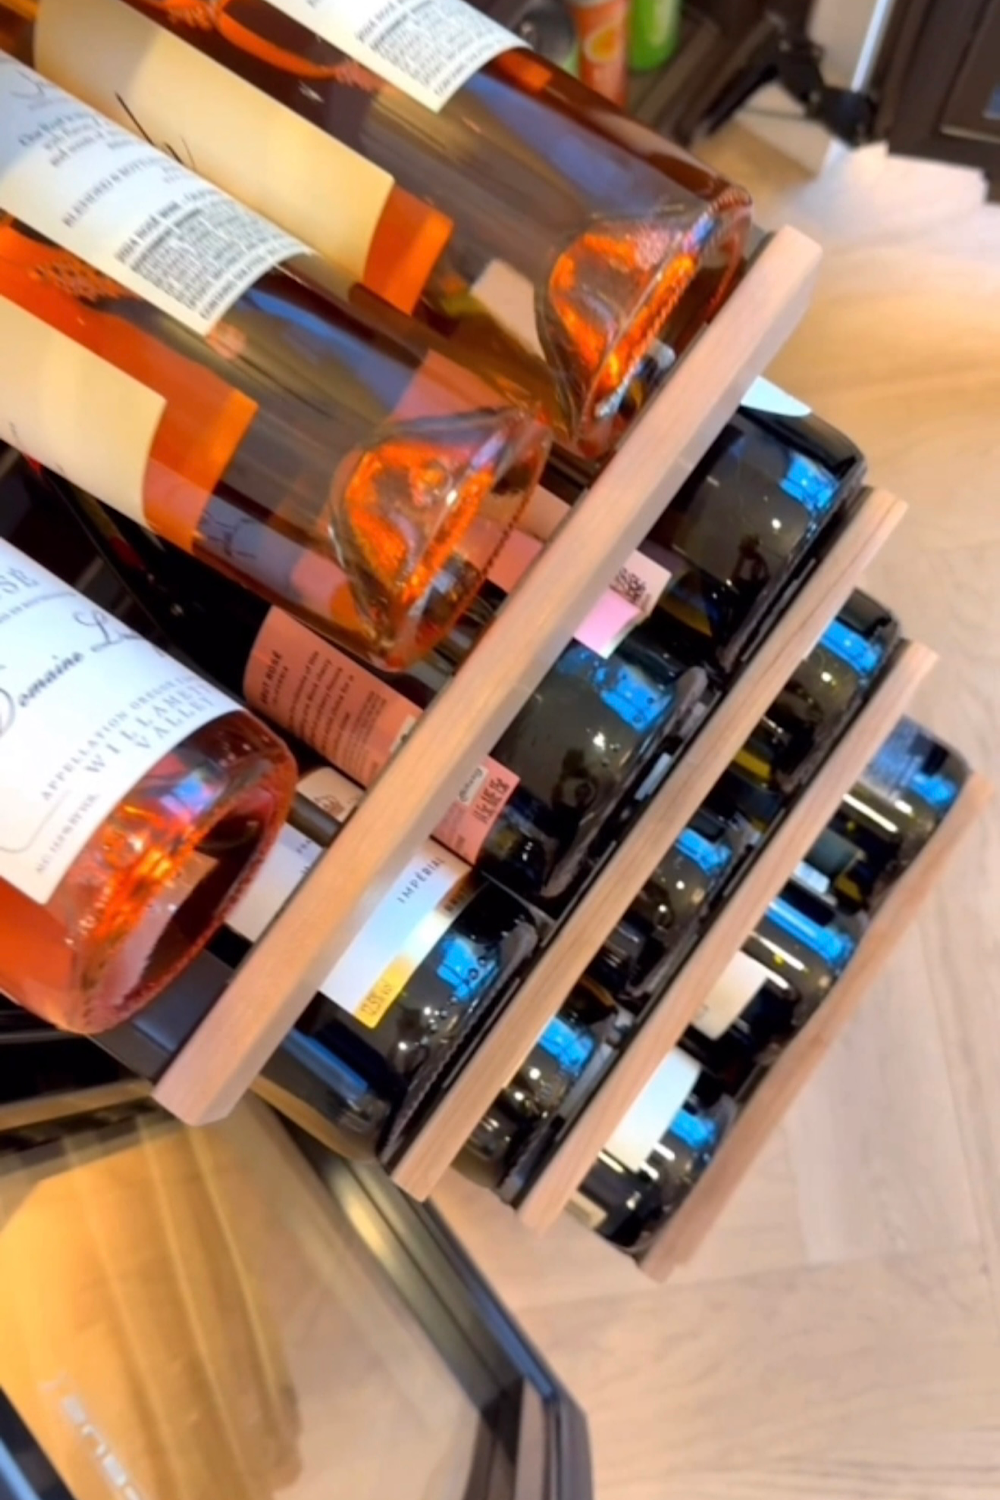
Which Sub-Zero Units Did We Choose and Why
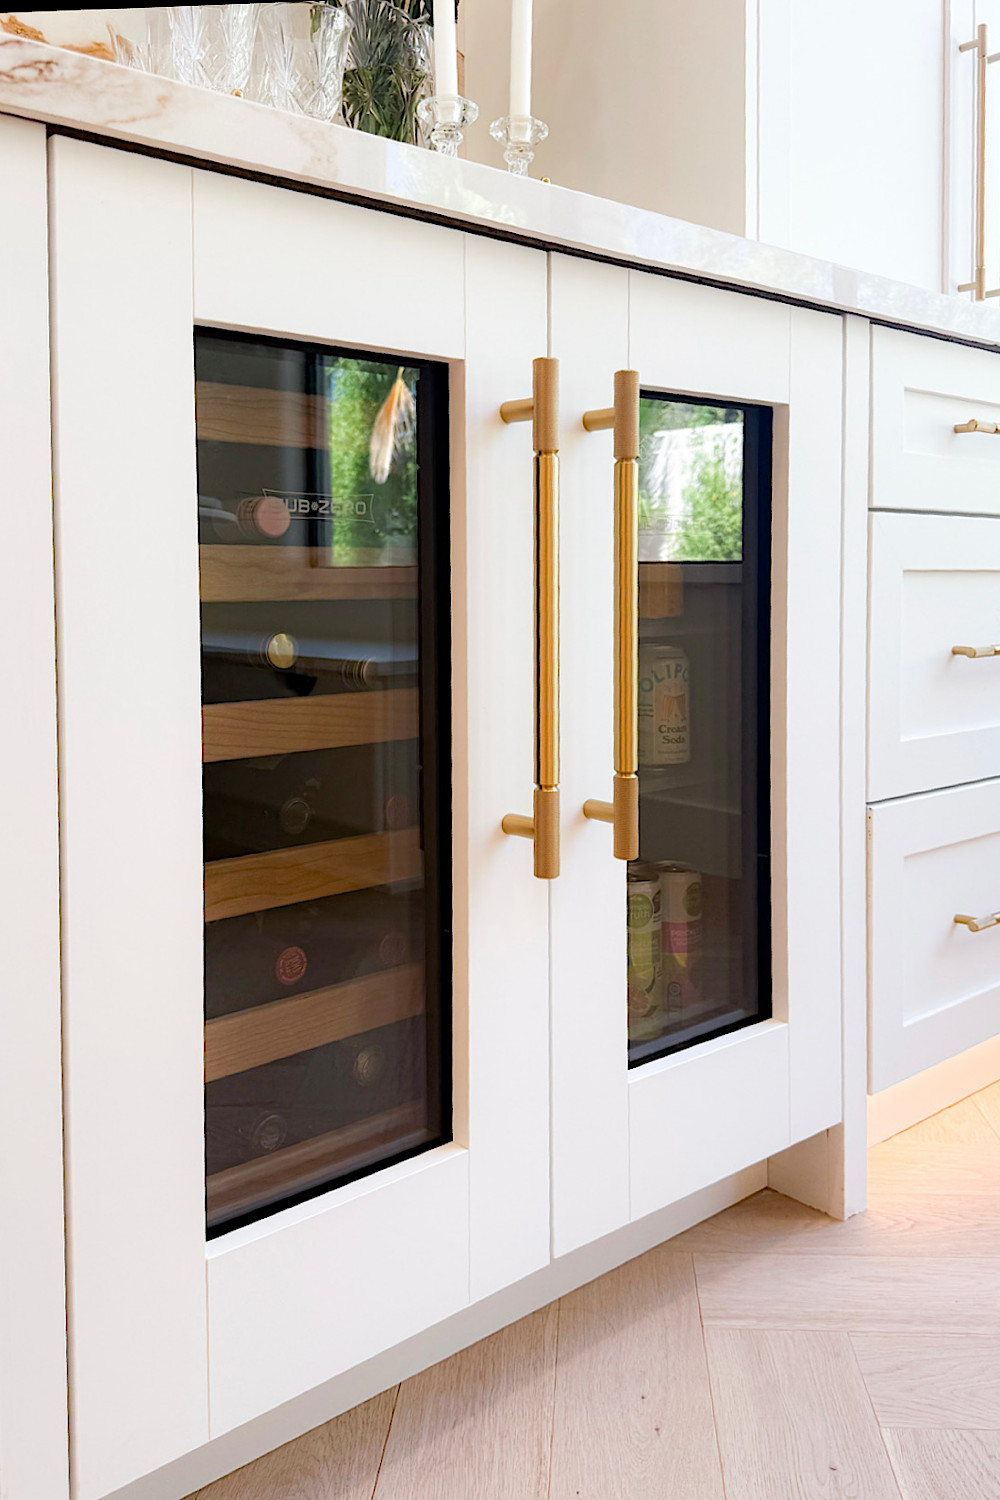
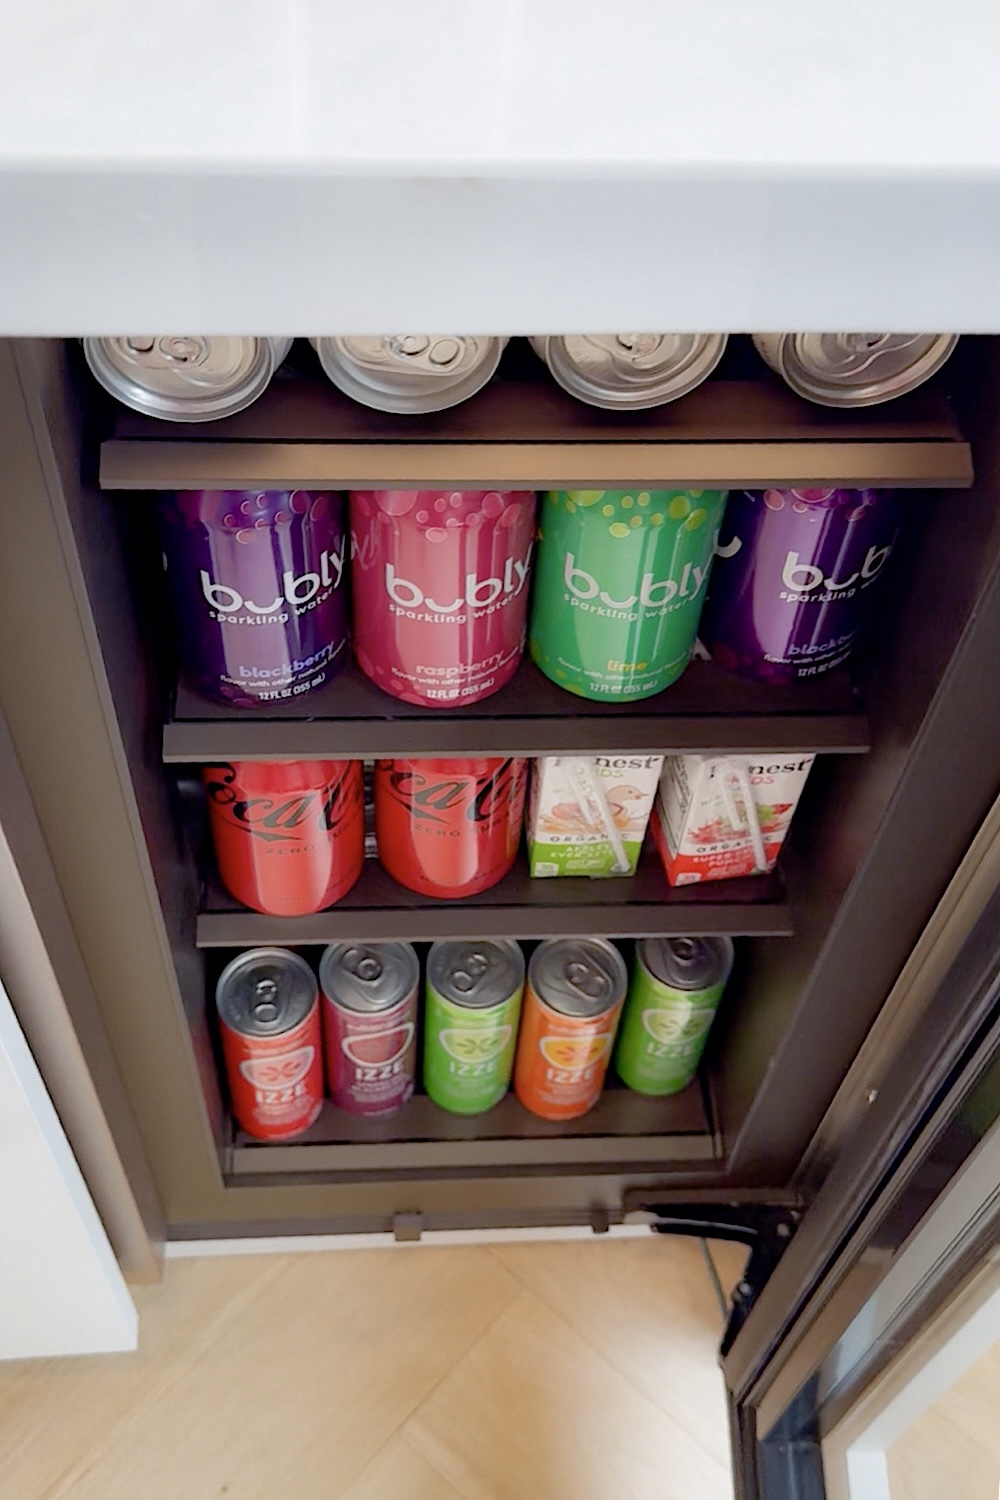
We ended up going with the 15″ Designer Undercounter Wine Storage – Panel Ready and the 15″ Designer Undercounter Beverage Center – Panel Ready side by side. That combination gave us a dedicated wine side and a separate beverage side, both fully panel-ready, so they blend completely into the cabinetry. The panel-ready option was non-negotiable for us. We did not want to see any appliances. We wanted the whole thing to look like one beautiful built-in cabinet situation, and that is exactly what we got.
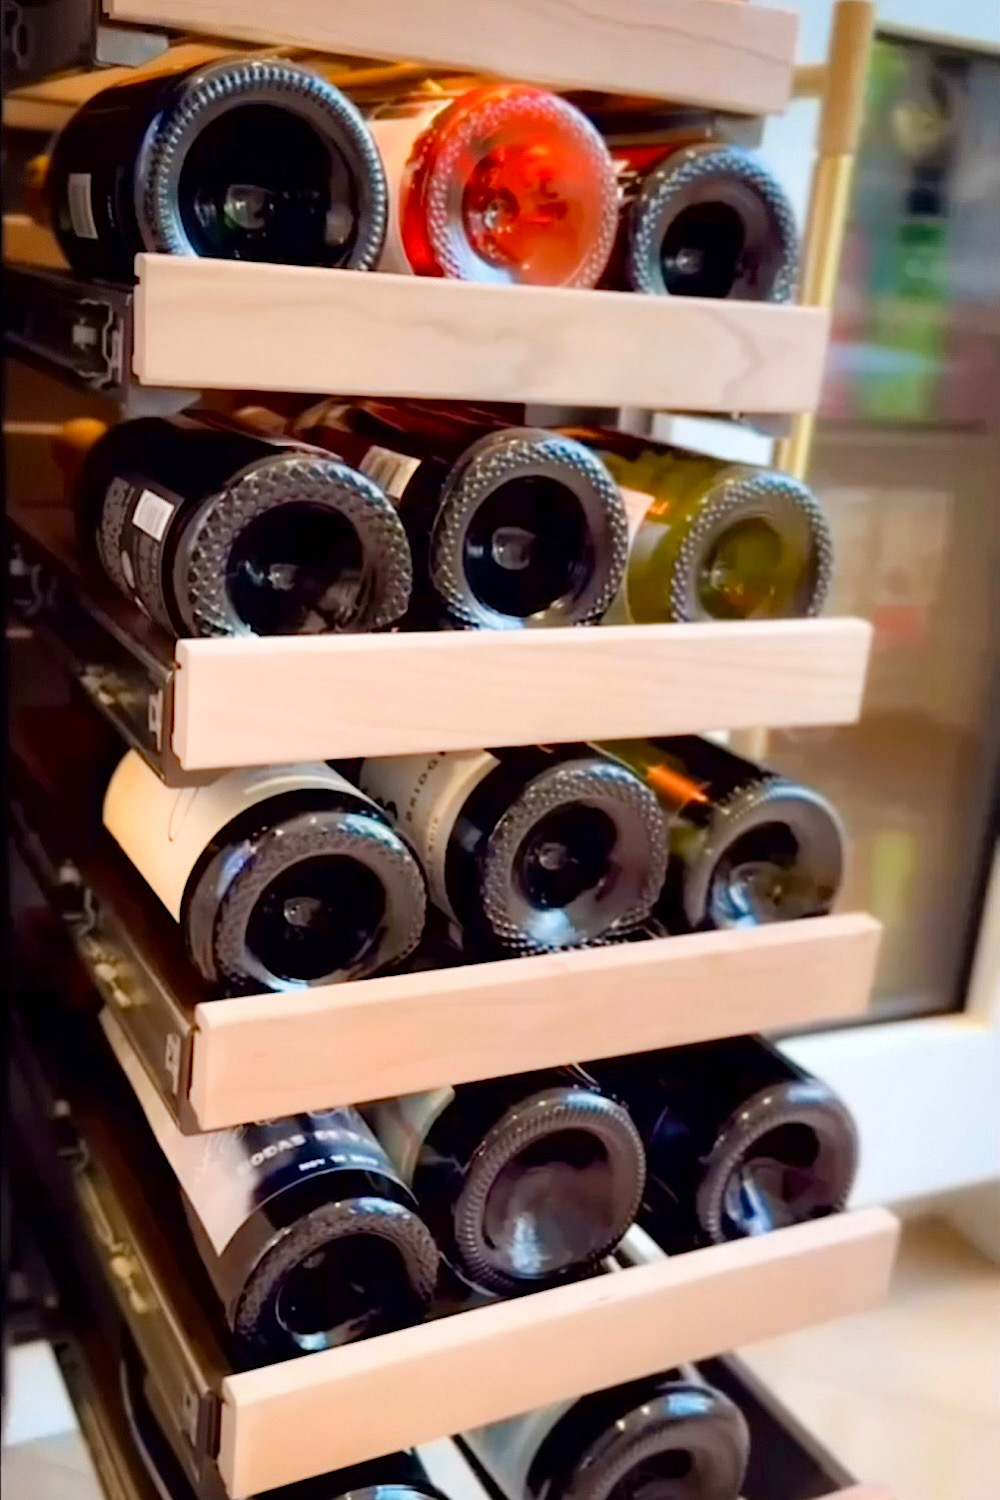
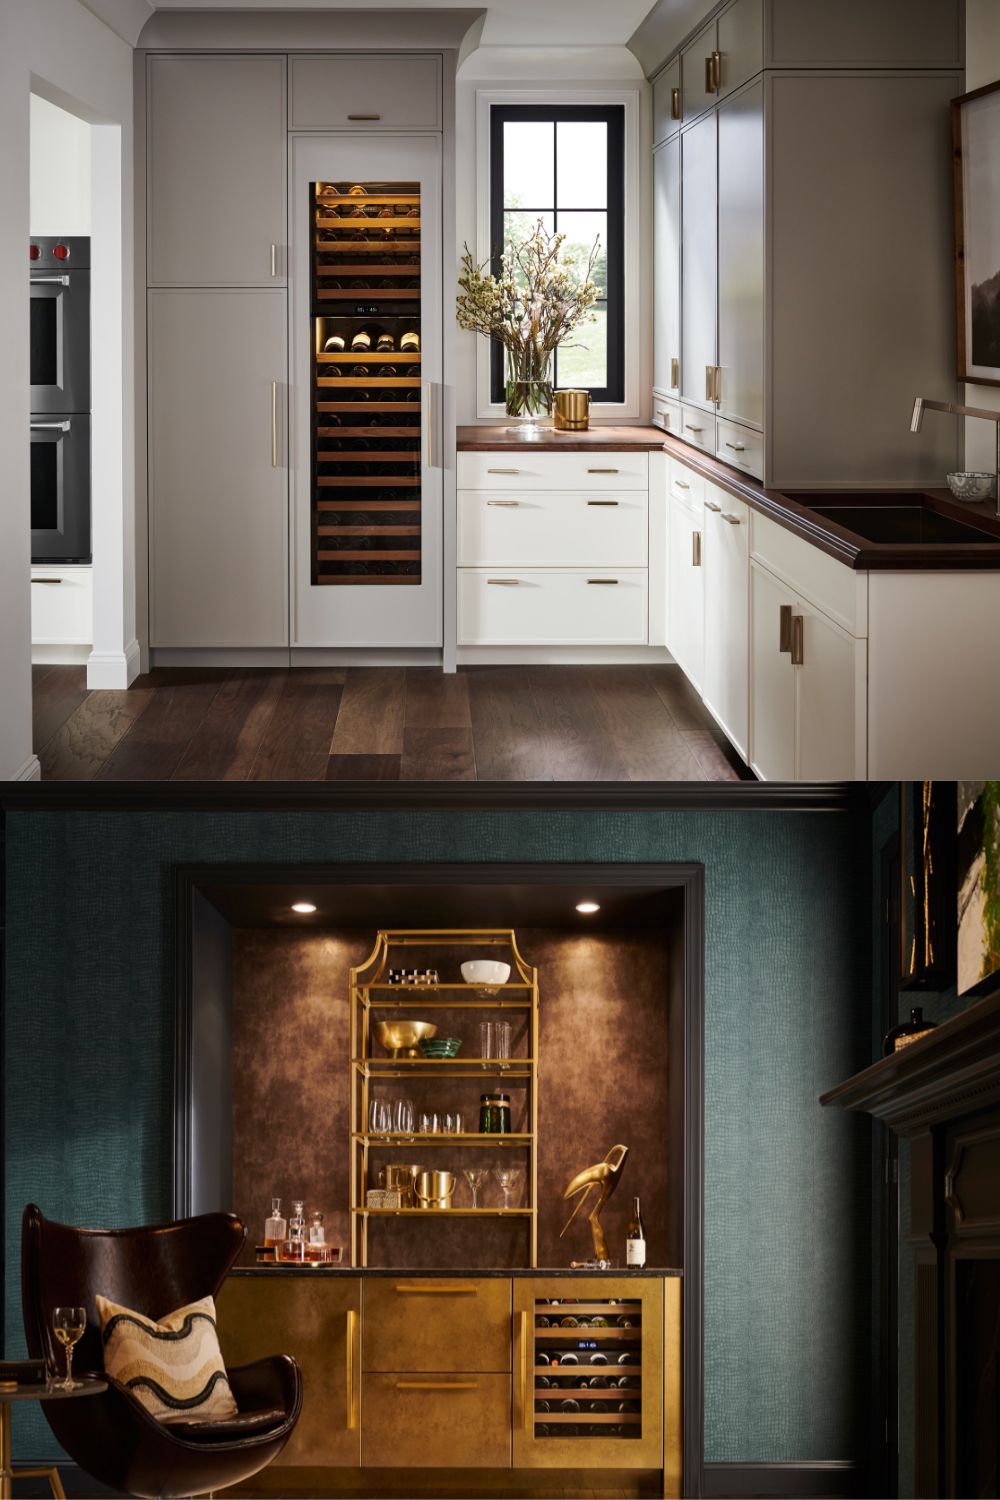
Sub-Zero offers its wine and beverage units in a range of sizes, from compact undercounter options like ours to full 30-inch wine columns, so there really is something for every kitchen and every space.
I broke down every single model in detail in my Sub-Zero wine refrigerator post, so I highly recommend checking that out before you make any decisions. It will save you so much time and help you figure out exactly what makes sense for your home.
Tip #7: Add a Sink to Your Beverage Station If You Want a “Wet Bar” Feel (Here Is Why We Did Not)

If you are designing a beverage station and you have the option to add a sink, consider it. A small prep sink transforms your drink station into a true wet bar situation and makes the whole space so much more self-contained and functional.
Rinsing glasses, dumping ice, wiping things down after a party, all of it happens right there without anyone needing to walk across the kitchen. It is such a practical addition, and for many spaces, it just makes total sense.
Why We Chose Not To and What We Did Instead

For us, though, it was a no. And here is why. Our beverage station sits really close to our kitchen island, and the island already has a large sink. Adding a second sink close to the first would have just looked strange. Like too much sink energy in one area of the kitchen. haha! When two sinks are visible from the same spot, it can look a little odd, and we really did not want that for our space.
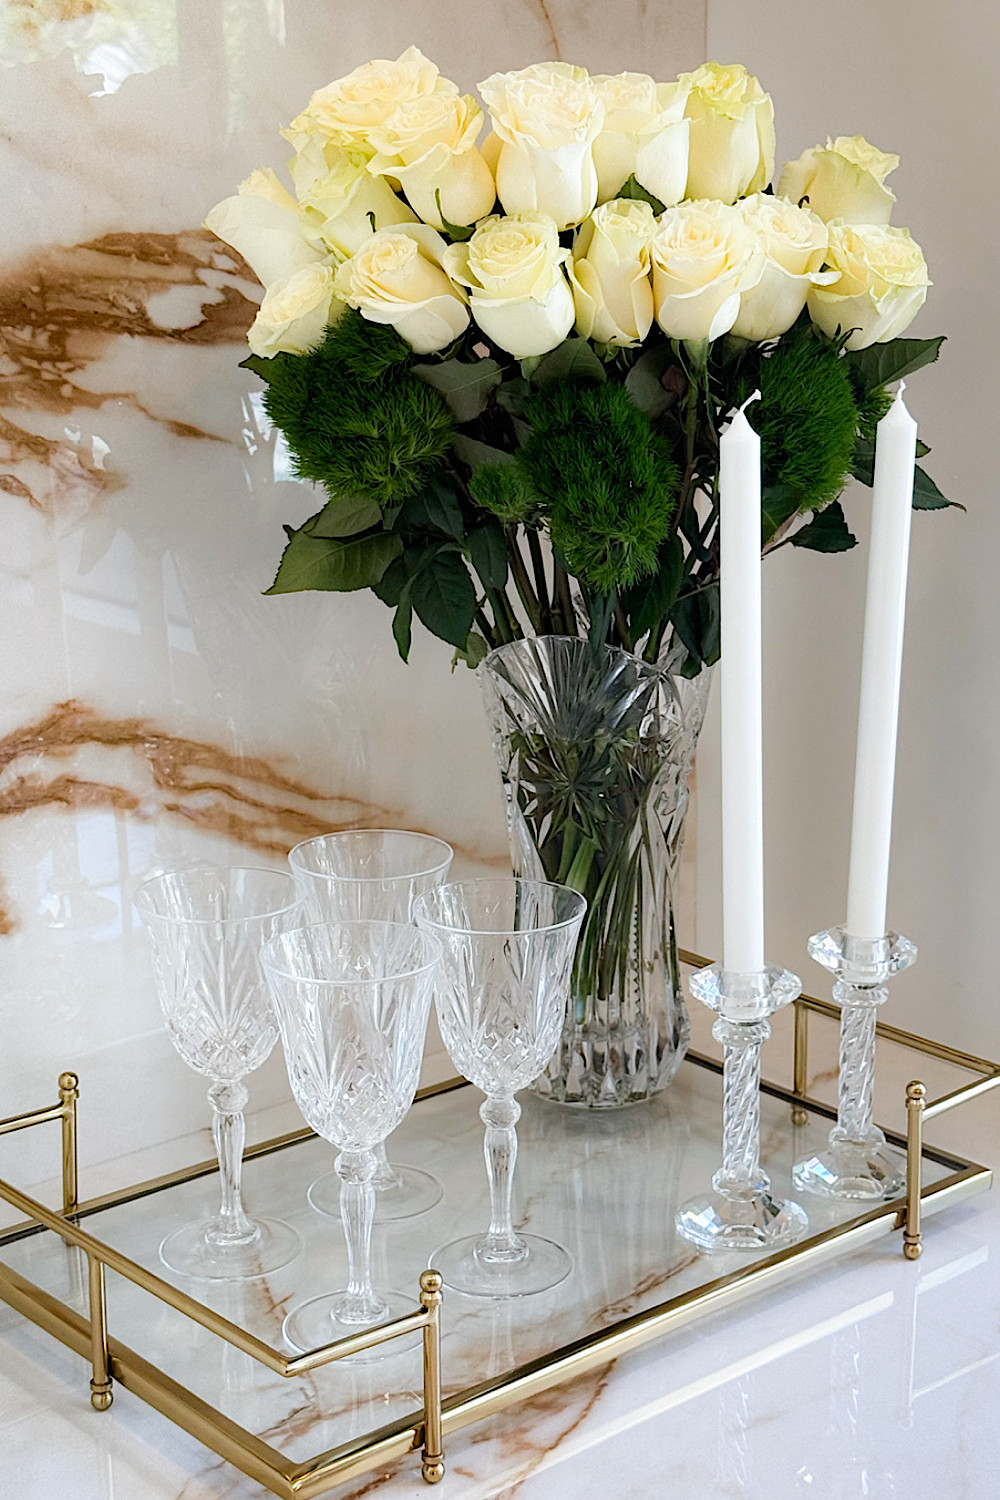
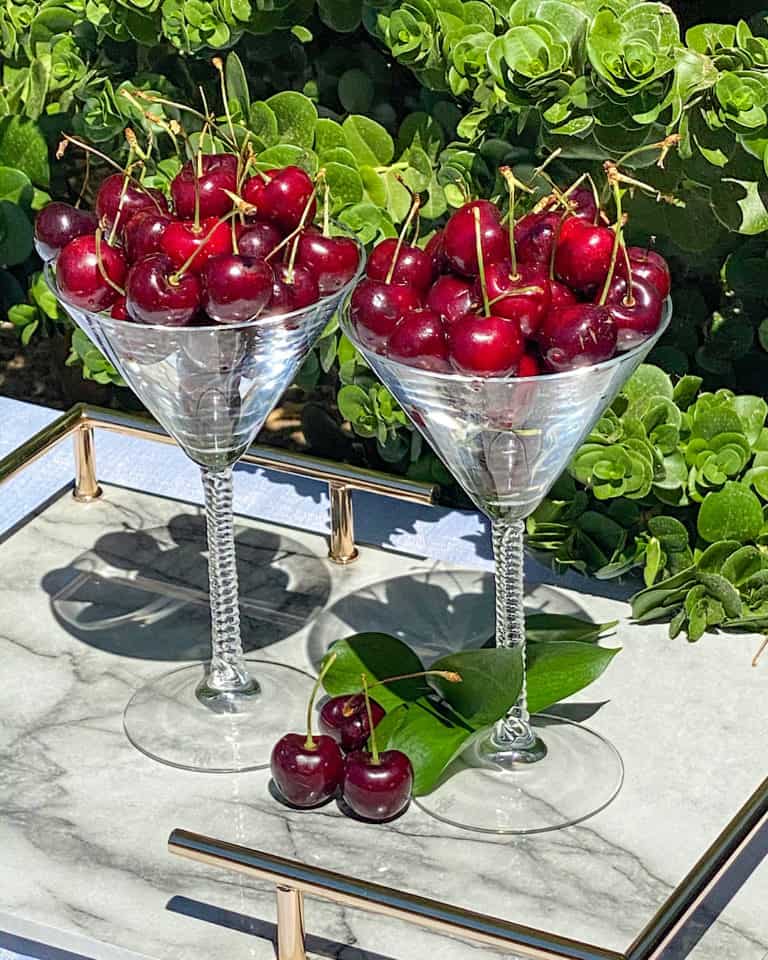
So instead of a sink, we used that countertop space as a decorative area. Fresh flowers and candles, and when we have guests coming over, we set out the wine and champagne glasses right next to the beverage station, so everything is ready and waiting. It looks beautiful, and it feels intentional rather than just functional.
But here is the thing…. If your beverage station is on the exact opposite side of the kitchen from your main sink, or in a space where no one would ever see two sinks together, then absolutely add it. It will change how your station functions for the better. Just think about your specific layout and decide based on what actually makes sense for your space.
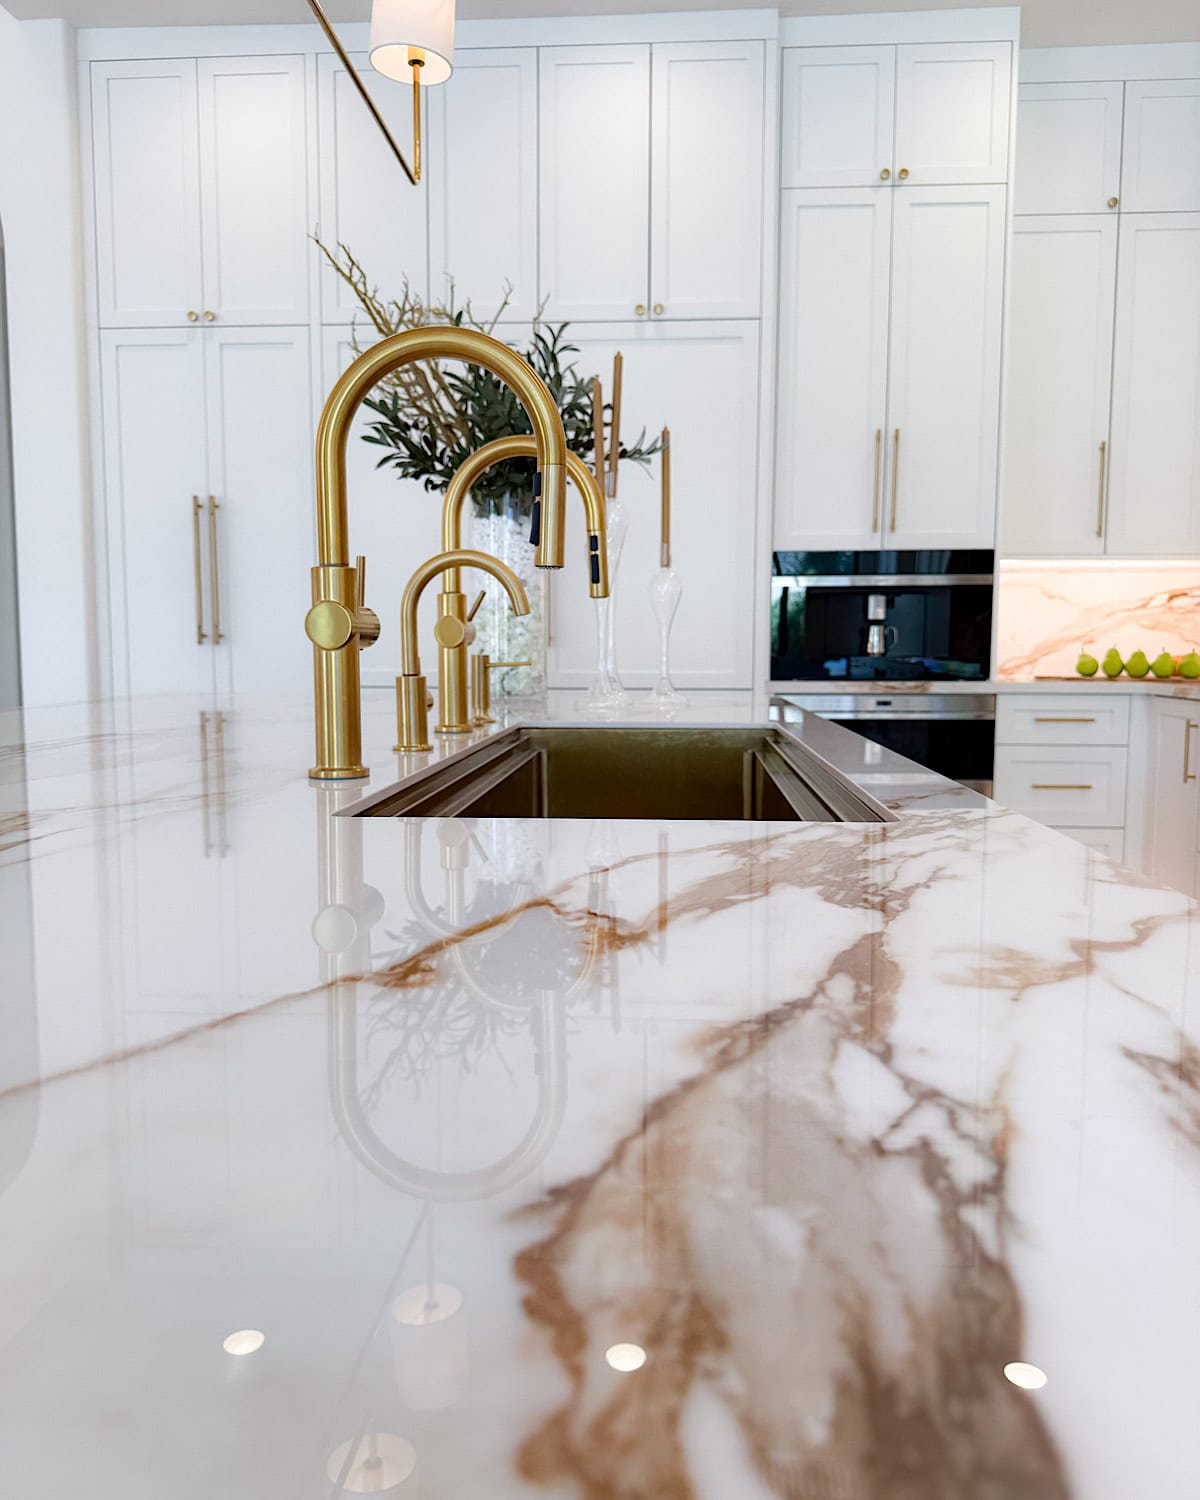
Tip #8: Choose Your Countertop Wisely Because It Is the Jewel of Your Kitchen

Okay, I know every single tip in this post feels important, and honestly, they all are, but your countertop deserves its own special attention. haha! Your countertop is honestly one of the most important decisions you will make in this entire process. It is the jewel of your kitchen. It is the first thing anyone sees when they walk in, and it is the first thing you see every single morning when you start your day. It sets the whole tone for the space.
We have been in our home for almost a year now, since the renovation wrapped up, and I cannot tell you how much I love and enjoy looking at our countertops every single day. It still makes me happy every time I walk into the kitchen, and that is exactly how it should feel when you make the right choice.
I am actually going to do a whole separate blog post very soon about which countertop we chose and why, because I have gotten so many DMs and messages on Instagram asking about it. The thickness, the material, all of it. So stay tuned for that because I have a lot to share!
Why We Chose Porcelain and What You Need to Know Before You Decide
Choosing the right countertop material is so much more important than just picking something that looks beautiful. You have to really understand each material and how it behaves in real life before you commit.
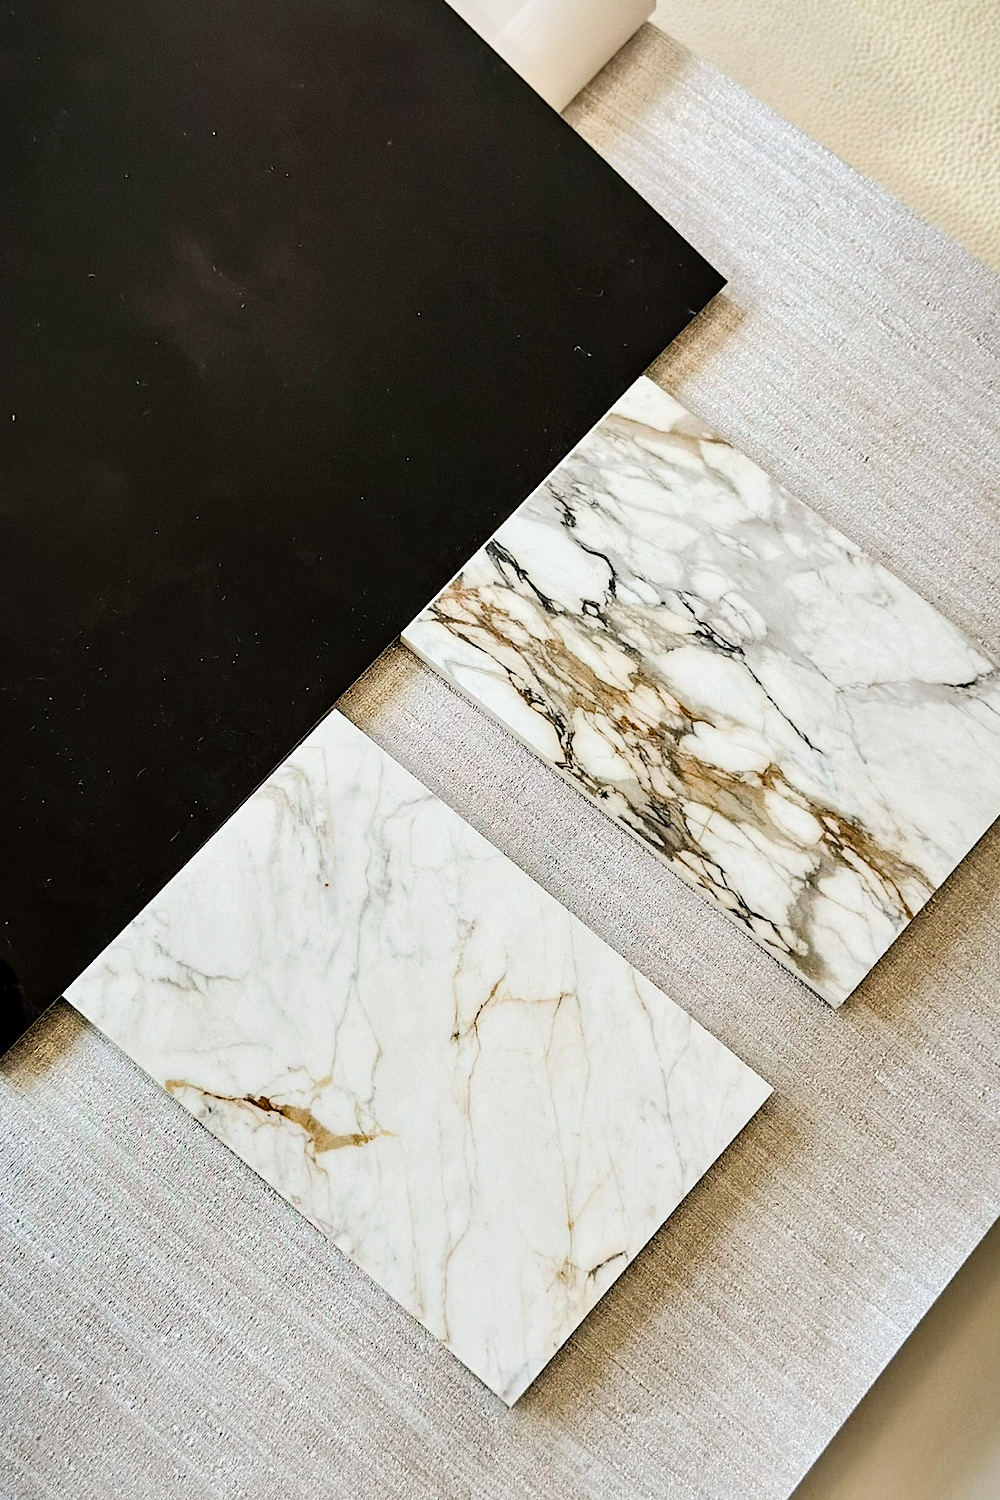
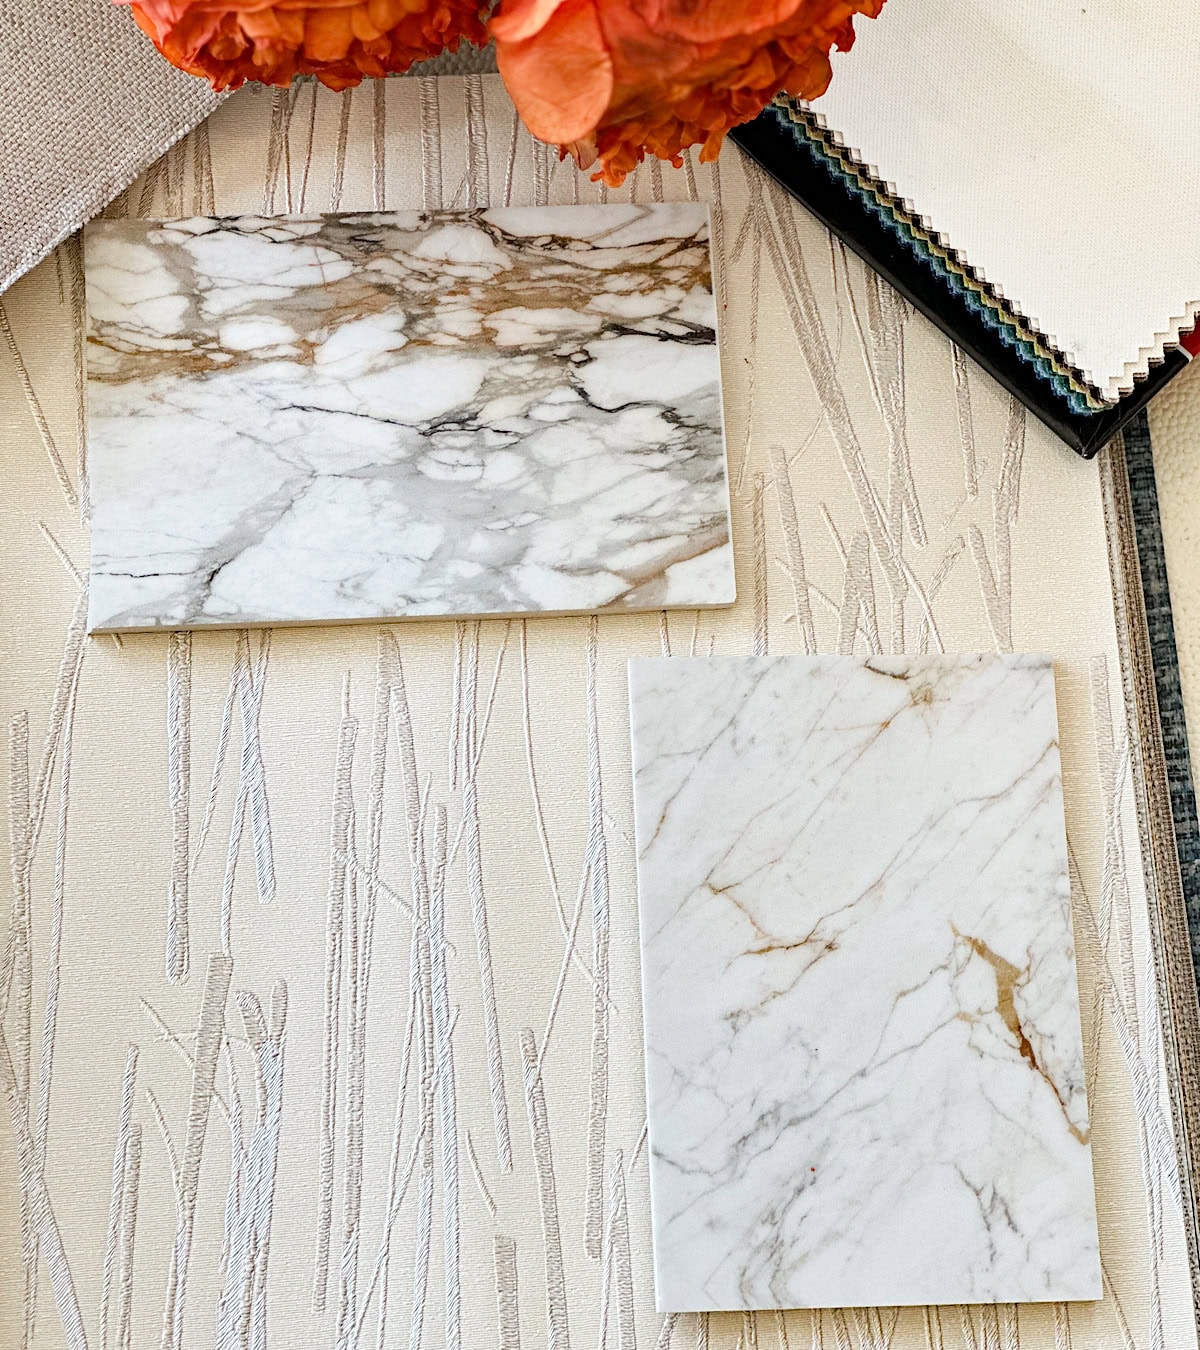
For example, we looked at several marble options during our research, and as gorgeous as it is, we learned pretty quickly that marble is very high-maintenance. Anything you put on it can leave a mark. Lemon juice, warm dishes, and even just everyday use can etch the surface over time. And around a beverage station where you are constantly setting down bottles, glasses, and drinks, that is really something you need to think about carefully before you decide.
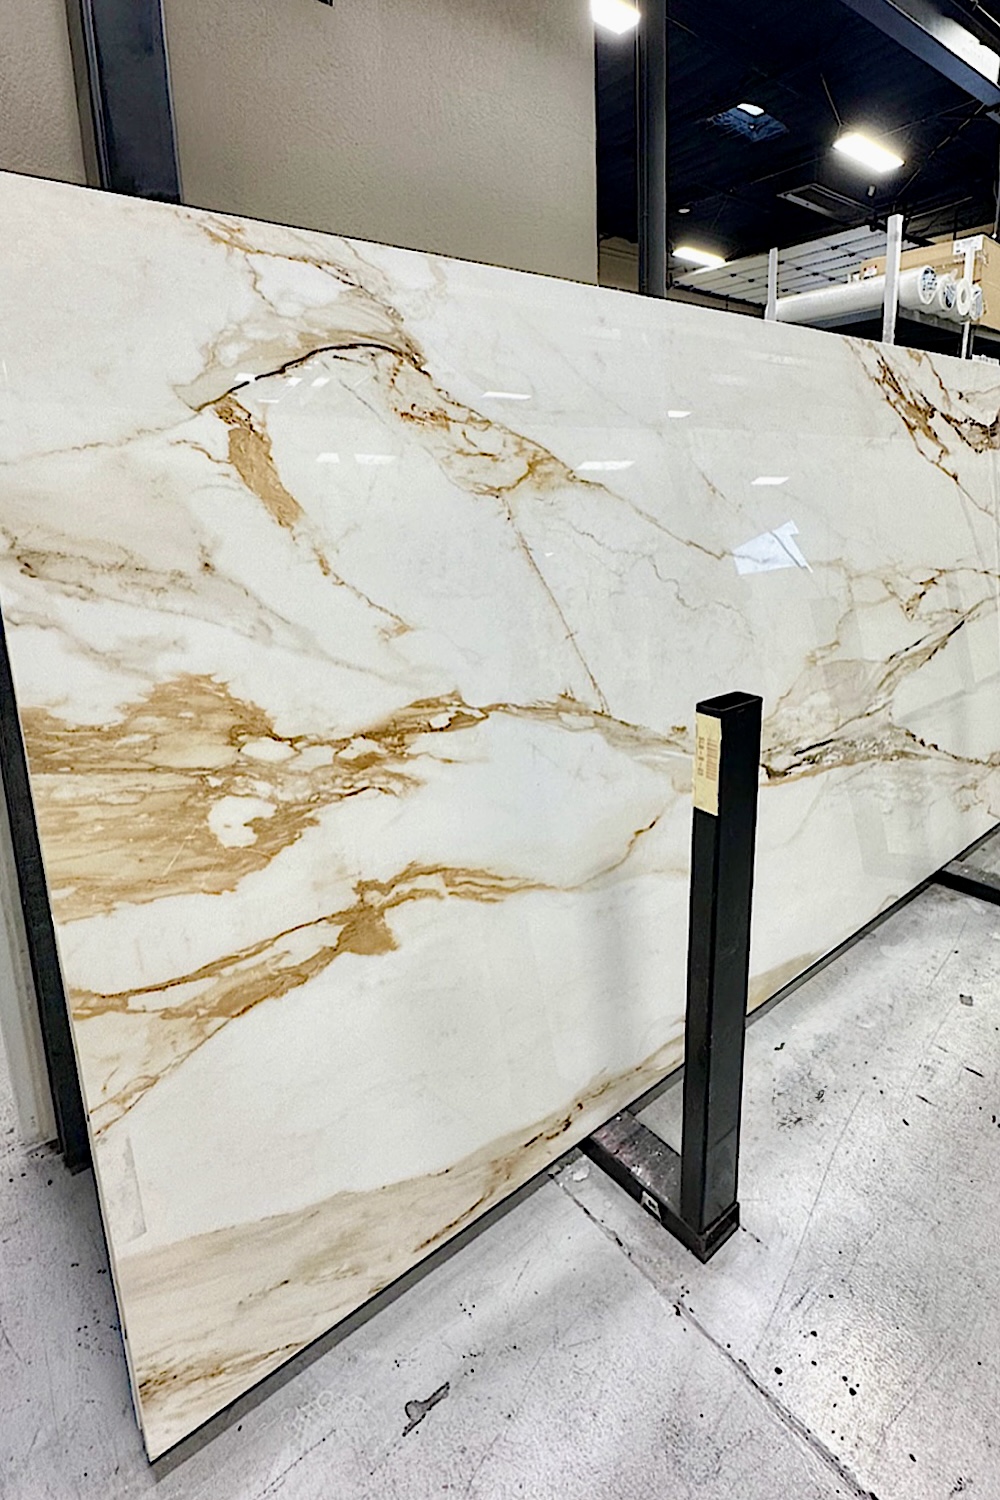
After looking at what felt like a million slabs, from marble to quartz to quartzite to so many other stones, in my opinion, porcelain was simply the most beautiful of them all.
What makes it so uniquely beautiful is actually how it is made. It is an engineered surface made by mixing refined clay, silica, feldspar, and mineral oxides, then compressing and firing at extreme temperatures. That process is what creates those incredibly rich, one-of-a-kind patterns that honestly look like they came straight from nature.
Every single slab is different, and when you see it on a countertop or a wall, it genuinely looks like a work of art. That is exactly why I could not resist it, and I have zero regrets. That said, porcelain has its own considerations, and I will share all of them, including the pros and cons, in my upcoming countertop blog post. So stay tuned because that one is going to be a good one!
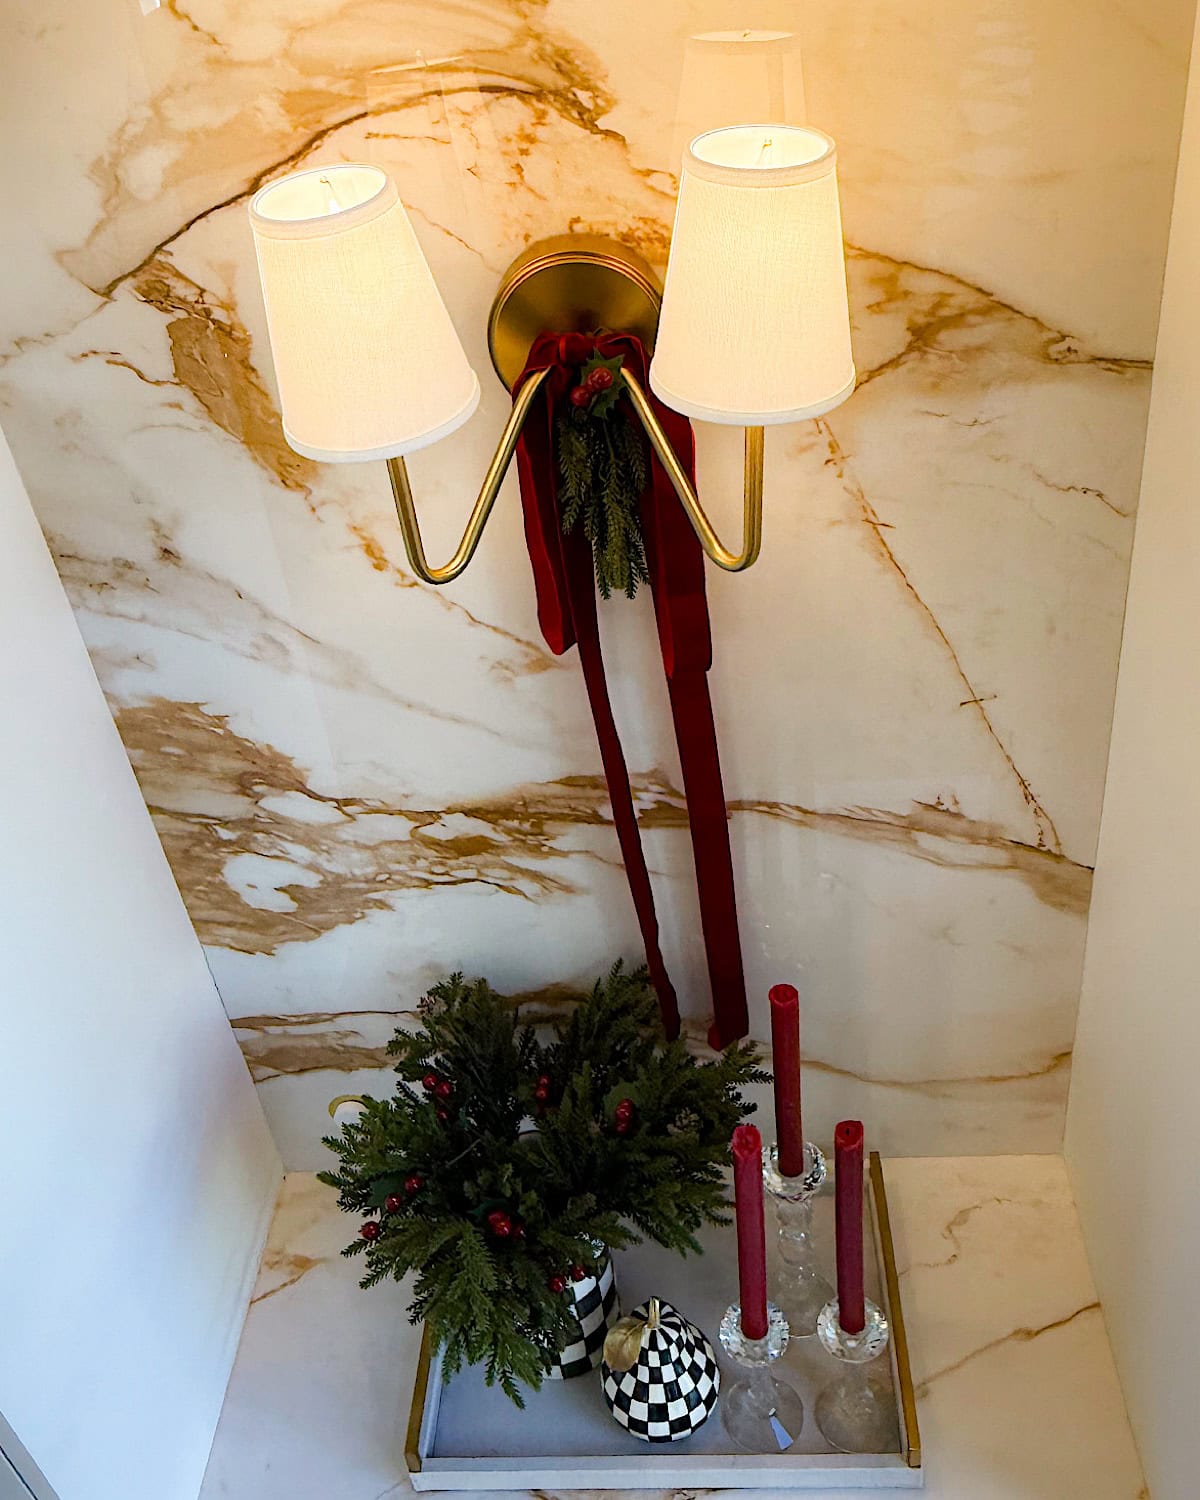
Tip #9: A Beautiful Beverage Station Is All in the Styling, and the Right Lighting Makes All the Difference
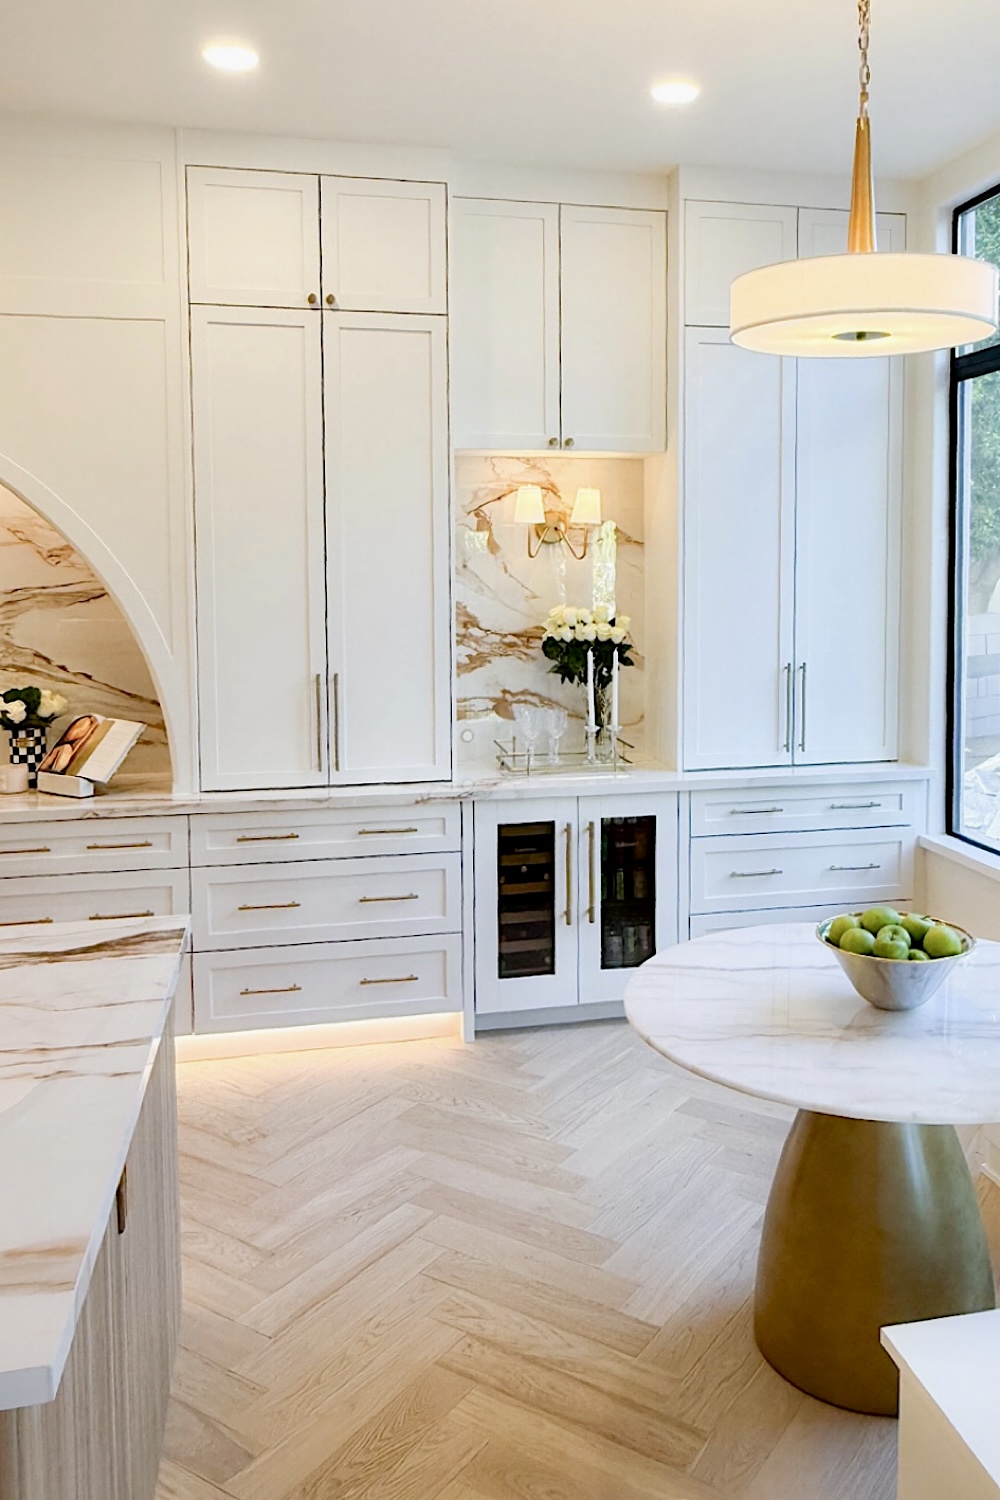
Once you have chosen the right countertop for your wine and beverage station, the next thing to consider is lighting. The right lighting does not just light up the space; it completes it. It ties everything together and takes your beverage station from really nice to absolutely stunning.
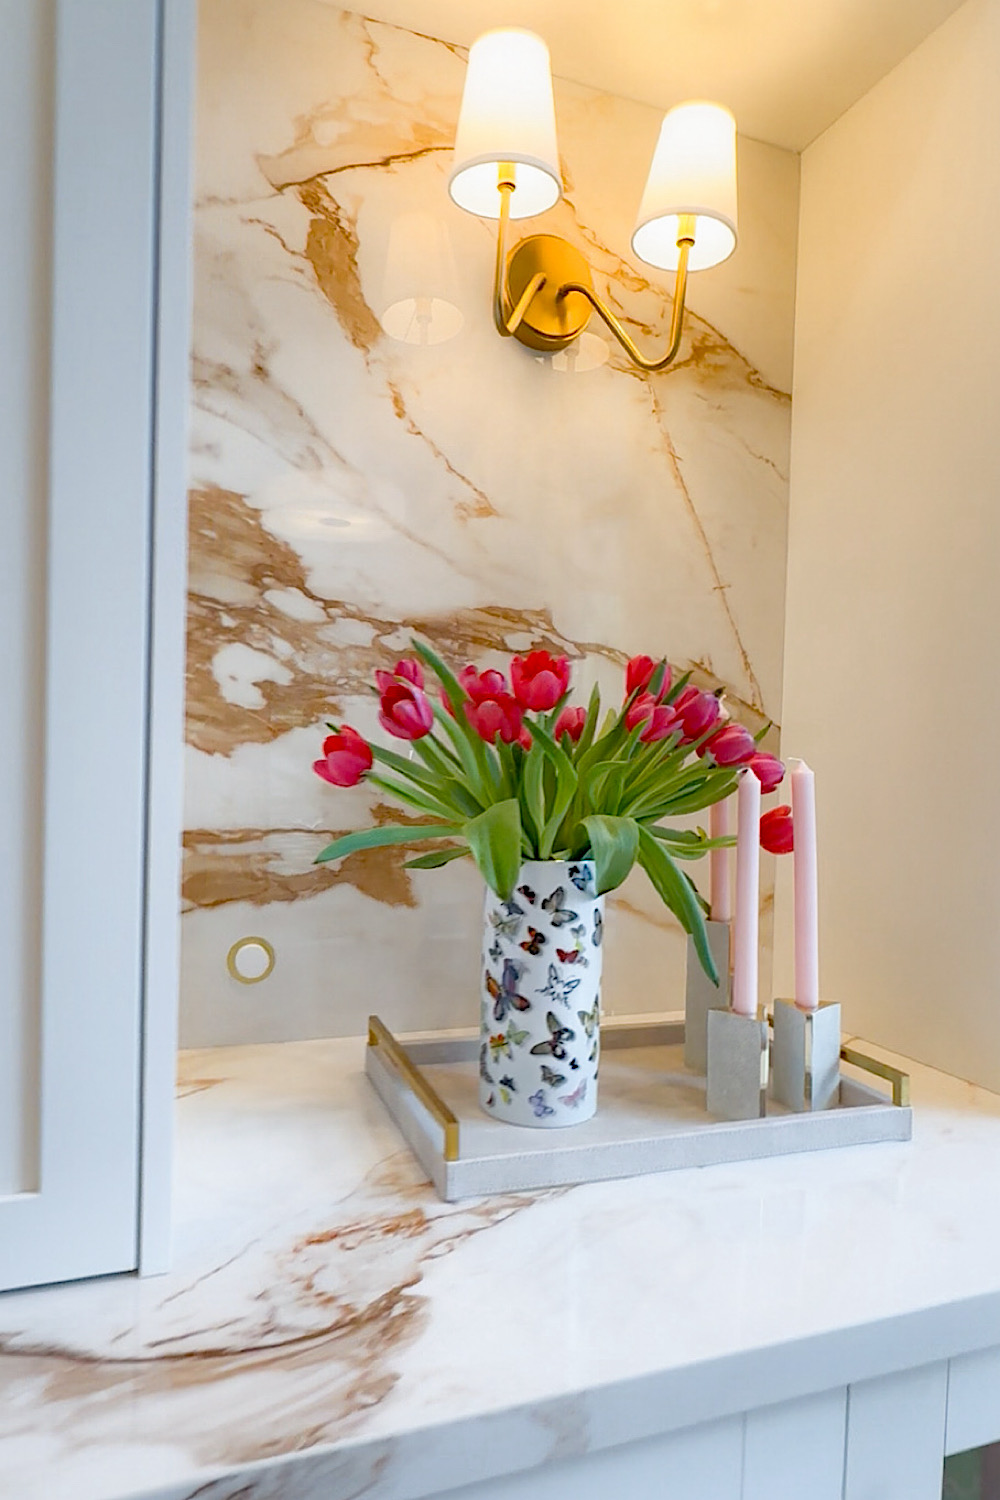
I am completely obsessed with sconces. Like, truly obsessed. There is something about them that reminds me of the most beautiful chic European homes I have ever seen or dreamed about.
They are timeless and elegant, adding so much character to a space. So, for our beverage station, there was really no other option I could think of. We went with sconces that felt both modern and classic. Not too modern, not too traditional, just that perfect balance that feels both collected and intentional.
The Sconce Mistake We Made and How You Can Avoid It
This is exactly why everything I said about planning early matters so much. Measurements are everything when it comes to lighting, and this was actually one of the miscalculations we made in our own renovation.
By the time our countertop slab was up and everything was installed, we realized our sconce placement was sitting a little higher than we would have liked. And because the electrical work was already done inside the walls and the slabs were already in place, there was absolutely nothing we could do about it.
That limited our sconce options quite a bit because we needed a specific size and proportion to make it work with where the wiring landed. There were so many sconces I really, really wanted for that space, but due to the sizing and measurement issue, I just could not use them, and it was so frustrating.
Take this one seriously because we learned it the hard way. Before you finalize your electrical rough-in, make sure your countertop slab is chosen, know its exact thickness, and physically stand in that space to picture where you want your sconces to sit above it. That one extra step will save you so much frustration and open up so many more beautiful options when it comes time to shop for your lighting.
Final Thoughts
If there is one thing I want you to take away from this post, it is this: A beautiful beverage station is absolutely possible for your home, no matter your budget or your space. Plan carefully, take your time, do not rush the decisions that matter, and do not give up when it gets hard. The end result is so worth it!
I really hope this was helpful for those of you thinking about adding a beverage station to your home. We put so much thought and love into ours, and I wanted to share every detail with you so you can do the same. If you have questions, drop them in the comments below. I am always here.
Love,
Sherry XOXO